

 1. Ruby and Sapphire.
1.1. Batteries.
Pokémon Ruby and Sapphire include batteries inside the cartridge, which will take care of the internal clock and timed events. Normally, the RNG of Ruby and Sapphire is as random as it can possibly get, but when the battery runs out, it starts behaving differently. Usually, this would be a bigger concern with Emerald, as it works the same way as a dry-battery Ruby or Sapphire, even if the battery is fully functional. You can read more about how this all works in its own section for Pokémon Emerald, although it works almost the same in this case with Ruby and Sapphire.
1.2. Illuminate and the White Flute.
This generation introduced new mechanics that increase the encounter rate significantly, making it almost essential for any hunt. These two new tools are the ability Illuminate, which doubles the encounter rate, and the White Flute, an instrument that, when played, increases the encounter rate by 50% until the player exits the location (like going to another route).

There are a few Pokémon with the Illuminate ability available in Ruby and Sapphire: Staryu, Starmie, Chinchou, Lanturn, and Volbeat. Out of them all, Volbeat is the earliest to appear during the story, on Route 117, although Sapphire has a notable advantage over Ruby: an 18% chance to encounter it, compared to Ruby's 1% chance. It wouldn't be as much trouble if Illuminate wasn't Volbeat's only ability. If you aim to use this ability as soon as possible, it's usually faster to trade one from Sapphire. If the point in the game where it appears doesn't matter, Chinchou is always easier to find.
The White Flute can be obtained as soon as you get to Route 113's Glass Workshop and receive the Soot Sack, which you can use to collect the ashes from the tall grass. Every time you step into a tall grass tile covered by ashes, they will be cleaned, and it will count one towards the sack. After collecting 1000 steps, you will be able to purchase the White Flute in the Glass Workshop. This method can be repeated as many times as you want.
Using these two bonuses together is the basis of any hunt that involves random encounters.
1.3. Received and Interactable Pokémon.
| Pokémon | Level | Moves | Location | Notes |
|---|---|---|---|---|
| Received Pokémon | ||||
 |
5 | Pound (35) Leer (30) |
Route 101 | Starter |
 |
Scratch (35) Growl (40) |
|||
 |
Tackle (35) Growl (40) |
|||
 |
25 | Powder Snow (25) Rain Dance (5) Sunny Day (5) Hail (10) |
Weather Institute | Goft after beating Team Magma/Aqua |
 |
5 | Take Down (20) | Steven Stone's house Mossdeep City |
Gift after beating the Pokémon League |
 |
5 | Splash (40) Charm (20) Encore (5) |
Lavaridge Town | Is given as an egg |
 |
20 | Scratch (35) | Route 111 (desert) | Found as a fossil. Can only choose one |
 |
20 | Astonish (15) | ||
| Interactable Pokémon | ||||
 |
30 | Faint Attack (20) Fury Swipes (15) Psybeam (20) Screech (40) |
Route 119 and 120 | Invisible Requires Devon Scope |
 |
25 | Tackle (35) Screech (40) Sonic Boom (20) Spark (20) |
New Mauville | Found as a fake item |
 |
30 | Screech (40) Sonicboom (20) Spark (20) Selfdestruct (5) |
Team Magma/Aqua Hideout | Found as a fake item. Remember to bring a Pokémon with Damp |
1.4. Legendaries.
| Pokémon | Level | Moves | Location | Notes |
|---|---|---|---|---|
 |
45 | Slash (20) Bulk Up (20) Earthquake (10) Fire Blast (5) |
Cave of Origin | After awakening it in Seafloor Cavern with the Red Orb. Ruby only |
 |
45 | Body Slam (15) Calm Mind (20) Ice Beam (10) Hydro Pump (5) |
Cave of Origin | After awakening it in Seafloor Cavern with the Blue Orb. Sapphire only |
 |
40 | Superpower (5) Ancient Power (5) Curse (10) Rock Throw (15) |
Desert Ruins | After solving the Sealed Chamber puzzle |
 |
40 | Superpower (5) Ancient Power (5) Curse (10) Icy Wind (15) |
Island Cave | |
 |
40 | Superpower (5) Ancient Power (5) Curse (10) Metal Claw (35) |
Ancient Tomb | |
 |
70 | Fly (15) Rest (10) Outrage (15) Extremespeed (5) |
Sky Pillar | After beating the Pokémon League |
 |
50 | Mist Ball (5) Psychic (10) Recover (20) Charm (20) |
Southern Island | Eon Ticket necessary to access the island. Only in Ruby |
 |
50 | Luster Purge (5) Psychic (10) Recover (20) Dragon Dance (20) |
Eon Ticket necessary to access the island. Only in Sapphire | |
|
40 | Protect (10) Psychic (10) Refresh (20) Mist Ball (5) |
Roaming the region | After beating the Pokémon League. You'll hear about a red flying Pokémon on the TV. Only in Sapphire |
|
40 | Protect (10) Psychic (10) Refresh (20) Luster Purge (5) |
After beating the Pokémon League. You'll hear about a blue flying Pokémon on the TV. Only in Ruby |
 2. FireRed and LeafGreen.
2.1. Time.
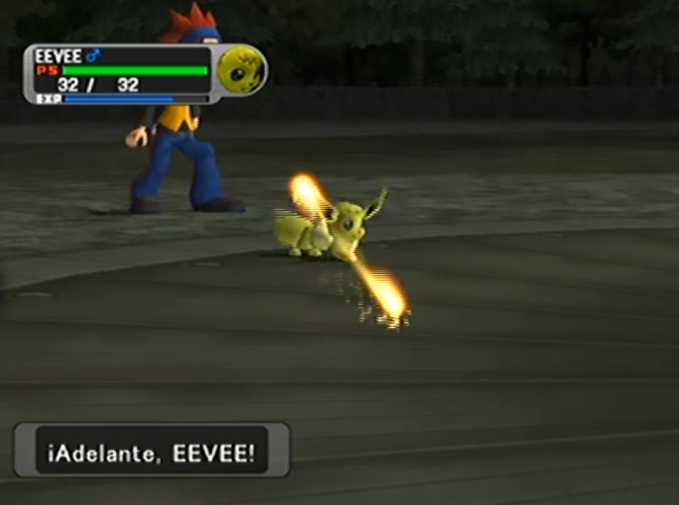
FireRed and LeafGreen lack an internal battery, which has its pros, but one of the cons is that you cannot evolve Eevee into Espeon or Umbreon. This is especially bad when you think about the fact that, in the main games, Eevee can only be obtained in Kanto. If you hunt for Eevee and want to evolve it, you will need to trade it to one of the Hoenn games while the battery is active (if you want both). Another method is trading it to XD: Gale of Darkness, where you can evolve it as long as you have a Sun or Moon Shard in the bag.


2.2. Game Corner.
| Pokémon | Level | Full team | Coins | Notes |
|---|---|---|---|---|
 |
9 (FR) 7 (LG) |
Can buy 5 at once 900 coins (FR) 600 coins (LG) |
180 (FR) 120 (LG) |
|
 |
8 (FR) 12 (LG) |
Can buy 5 at once 2500 (FR) 3750 (LG) |
500 (FR) 750 (LG) |
|
 |
18 (FR) 24 (LG) |
Can buy 3 at once (FR) 8400 coins (FR) Can buy 2 at once (LG) 9200 coins (LG) |
2800 (FR) 4600 (LG) |
|
 |
25 | Can only buy 1 at once | 5500 | FireRed exclusive |
 |
18 | Can buy 3 at once 7500 coins |
2500 | LeafGreen exclusive |
 |
26 (FR) 18 (LG) |
Can only buy 1 at once | 9999 (FR) 6500 (LG) |
2.3. Received and Interactable Pokémon.
| Pokémon | Level | Moves | Location | Notes |
|---|---|---|---|---|
| Received Pokémon | ||||
 |
5 | Tackle (35) Growl (40) |
Pallet Town | Starter |
 |
5 | Scratch (35) Growl (40) |
||
 |
5 | Tackle (35) Tail Whip (30) |
||
 |
5 | Splash (40) | Route 3 (Pokémon Center) | Bought for 500 Pokémon Dollars |
 |
25 | Helping Hand (20) Sand Attack (15) Growl (40) Quick Attack (30) |
Celadon Condominiums in Celadon City | Found in a Pokéball. Enter through the back door of the building |
 |
25 | Mist (30) Body Slam (15) Confuse Ray (10) Perish Song (5) |
Silph Co. 6th floor | |
 |
25 | Comet Punch (15) Agility (30) Pursuit (20) Mach Punch (30) |
Saffron City's Karate Dojo | Gifted after beating the Karate Master. Can only choose one |
 |
25 | Rolling Kick (15) Jump Kick (25) Brick Break (15) Focus Energy (30) |
||
 |
5 | Scratch (35) Harden (30) |
Mt. Moon | Can only choose one. Revived on Cinnabar Island |
 |
5 | Constrict (35) Withdraw (40) |
||
 |
5 | Wing Attack (25) | Pewter City | Revived on Cinnabar Island |
 |
Egg | Growl (40) Charm (20) Metronome (10) |
Water Labyrinth | Given if a team member has high friendship |
| Interactable Pokémon | ||||
 |
30 | Headbutt (15) Yawn (10) Rest (10) Snore (15) |
Routes 12 and 16 | Requires the Poké Flute |
 |
34 | Sonicboom (20) Spark (20) Selfdestruct (5) Rollout (20) |
Power Plant | Camouflaged as an item |
 |
30 | Headbutt (15) Poison Gas (40) Meditate (40) Psychic (10) |
Berry Forest | |
2.4. Legendaries.
| Pokémon | Level | Moves | Location | Notes |
|---|---|---|---|---|
 |
50 | Mist (30) Agility (30) Mind Reader (5) Ice Beam (10) |
Seafoam Island | |
 |
50 | Thunder Wave (20) Agility (30) Detect (5) Drill Peck (20) |
Power Plant | |
 |
50 | Fire Spin (15) Agility (30) Endure (10) Flamethrower (15) |
Mt. Ember | |
 |
70 | Swift (20) Recover (20) Safeguard (25) Psychic (10) |
Cerulean Cave | After beating the Pokémon League |
 |
50 | Thundershock (30) Roar (20) Quick Attack (30) Spark (20) |
Roaming the region | If Squirtle was chosen as the starter |
 |
50 | Ember (25) Roar (20) Fire Spin (15) Stomp (20) |
If Bulbasaur was chosen as the starter | |
 |
50 | Bubblebeam (20) Rain Dance (5) Gust (35) Aurora Beam (20) |
If Charmander was chosen as the starter | |
 |
70 | Recover (20) Hydro Pump (5) Rain Dance (5) Swift (20) |
Navel Rock | Navel Rock can only be accessed with the Mystic Ticket |
 |
70 | Recover (20) Fire Blast (5) Sunny Day (5) Swift (20) |
||
 |
30 | Taunt (20) Pursuit (20) Psychic (10) Superpower (5) |
Birth Island | Birth Island can only be accessed with the Aurora Ticket. Attack form only in FireRed. Defense form only in LeafGreen |
 |
30 | Knock Off (20) Spikes (20) Psychic (10) Snatch (10) |
2.5. Unowns and their Shiny odds.
The Sevii Islands introduce multiple Pokémon not usually found in the Generation 3 games, the Unown being one of them. They always go hand in hand with riddles and mystery, and it wouldn't be less this time: a previous puzzle must be completed, the Tanoby Key, in order to unlock them. After that, they will start to appear in the Tanoby Chambers. There are seven of these chambers: the Monean Chamber (Unowns A and ?), the Liptoo Chamber (Unowns C, D, H, U, and O), the Weepth Chamber (Unowns N, S, I, and E), the Dilford Chamber (Unowns P, J, L, R, and Q), the Scufib Chamber (Unowns Y, G, T, F, and K), the Rixy Chamber (Unowns V, W, X, B, and M), and the Viapois Chamber (Unowns Z and !).
But the enigmas don't end there just yet. Here, the Unown letter is determined by the ID of the Pokémon, or PID. The problem comes when you keep digging and find out that your Trainer ID (TID) and Secret ID (SID) also influence both the shinyness and the letter of the Unown. This means that each letter will have different shiny odds depending on your TID and SID. These odds can go as high as 1 in 5120 and as low as 1 in 18432.
There's no way to know these odds in-game, but you can easily find out with the Unown Shiny Odds Calculator.
 3. Emerald.
3.1. Abilities outside of battle.
Among the things introduced in Emerald, some abilities got a new effect outside of battle, like passive interactions with other mechanics like wild encounters or eggs. Previously, there were some abilities that already worked like this, like Illuminate, but Emerald expanded the number of them. The following list covers those that are best suited for hunting.
| Ability | Effect outside of battle | Recommended Pokémon |
|---|---|---|
| Flame Body Magma Armor |
The number of cycles to hatch the eggs in the party are halved |
|
| Static | 50% chance to find a wild electric-type Pokémon |
|
| Magnet Pull | 50% chance to find a wild steel-type Pokémon |
|
| Hustle Pressure Vital Spirit |
50% chance for wild Pokémon to appear at the higher part of their level range |
|
| Keen Eye Intimidate |
50% chance to prevent a wild encounter with a Pokémon that is 5 levels lower than the user |
|
| Suction Cups Sticky Hold |
Bites are more likely while fishing |
|
3.2. Emerald's RNG.
How it works.
You may have heard that Emerald's RNG is broken, which is something that sounds scary when it comes to Shiny hunting. Other people may say that Shiny hunting is directly impossible in Emerald, which is not only not true, but it also shows a lack of critical thinking and research, as multiple rumours, misconceptions, and fake information have been spread through the years that have long been debunked on uncountable occasions. Emerald is a good game to hunt on; it also introduces multiple unique hunts that could be missed if you decide to avoid it. To understand how Emerald's RNG works, the first thing we need to know is what a seed is.
Due to the impossibility of making a true random number generator, the game uses pseudorandom numbers, which determine the result of anything that should be random. This includes things like a Pokémon's IVs. These pseudorandom numbers are generated through the use of a formula that uses a special number called "seed".
This seed is chosen every time the game is booted up. In theory, each seed being different would make for a pretty seamless random game. The problem is that Emerald always sets its seed to 0. This means that it will always result in the same sequence of numbers. In a way to make the game feel a bit more "random", it generates 60 instances of these numbers per second. Each of them is known as a "frame".
Each frame will determine multiple parameters of the game. In a wild battle, it influences the PID, nature, IVs, ability, etc. If the frames are always generated in the same sequence, this means that you may be able to land in the same frame multiple times, making the results the same. It is a difficult task, so doing it accidentally is highly unlikely, but if timed and calculated correctly, you can land on a specific frame, giving you the desired result. This is known as RNG abuse.
As for Shiny hunting, you may know by now that your Secret ID influences the process of finding a Shiny. A Pokémon ID that results in a Shiny in combination with your SID most likely may not result in a Shiny when combined with your friend's SID. This means that, even if all the seeds are the same (0), the Shiny frames won't be the same for everyone. Still, this is not the biggest worry.
Shiny hunting in Emerald is possible, as in any other game, but you may want to let the game run for a while to be as deep into the frames as possible. There is a workaround for this, though, which will be explained later on. As for the things you are better off avoiding, soft-reset hunts are not recommended unless it's one of the starters. Being at the beginning of the game, you can erase the save file and create a new one every few resets (around 50, for example) to get a new SID, without it being a burden to get back to the point you were at. Getting Treecko, Torchic, or Mudkip in their Shiny form in Emerald is not only possible but also introduces a new twist to the hunt.
Legendaries are also huntable. There is a new hunt type: runaways, where you run away from the battle, then exit and enter the area again, and the Pokémon is generated again instead of resetting the game. This only works for interactable Pokémon that appear in the overworld. Emerald wasn't actually the first game to introduce this; Team Rocket's Hidout Electrode can be hunted like that in GSC, but Emerald expands upon the concept.

RNG duplicates.
Due to everything mentioned in the previous point, on highly unusual occasions, one may find a Pokémon that is an exact replica of another. This can happen if you accidentally land on the same frames when generating two Pokémon in different instances. These Pokémon will have the same IVs, nature, ability slot, PID, etc. This can also mean you may be able to find two duplicate Shiny Pokémon.
While nothing will happen to the game if it has two duplicate Pokémon, the goal is to get the Pokémon to be as random as possible.
Battle video and the Lilycove paintings.
So what is this magic technique that lets you "avoid" the quirks of Emerald's RNG? There are currently two methods for it: the battle video and the Lilycove paintings.
The battle video is a feature where you can save the last video of a battle fought in the Battle Frontier. This video will not only store that completely epic moment when you found an uncatchable Shiny Sunkern in the Battle Tower, but also the frame of when the battle started (when the screen fades to black). This is very helpful, as you can let the game go for a while and be able to continue from that point at any time. The problem with this method is that, as you may have imagined by now, you will need to make new battle videos after a while, or else you will fall back to the same loop as always: the same sequence of frames. It can still be used efficiently to hunt.
In recent years, it was discovered that, for some reason only Arceus almighty knows, when you interact with one of the paintings inside the Lilycove Museum, a new seed is generated, depending on the number of frames since the last hard reset. If you don't have a painting unlocked on the second floor of the museum (you need to win a max-level contest in order to have one), you can use the ones in the Lilycove Contest Hall. The seed goes back to 0 every time the game is started, as mentioned before, meaning that you will have to do the process every time, but it is a welcomed annoyance in exchange for what it gives back.
This painting method fits in nicely at the beginning of any session, taking just a few seconds of your time to give you a more steadily "random" hunting experience.
3.3. Runaway hunts.
| Pokémon | Level | Moves | Location | Notes |
|---|---|---|---|---|
 |
70 | Rest (10) Fissure (5) Solar Beam (10) Eruption (5) |
Terra Cave | After beating the Pokémon League. Beware of Fissure |
 |
70 | Hydro Pump (5) Rest (10) Sheer Cold (5) Double-Edge (15) |
Marine Cave | After beating the Pokémon League. Beware of Sheer Cold and Double-Edge |
 |
70 | Fly (15) Rest (10) Outrage (15) Extremespeed (5) |
Sky Pillar | After calming Kyogre and Groudon down in Sootopolis City |
 |
40 | Superpower (5) Ancientpower (5) Curse (10) Rock Throw (15) |
Desert Ruins | After solving the Sealed Chamber puzzle |
 |
40 | Superpower (5) Ancientpower (5) Curse (10) Icy Wind (15) |
Island Cave | |
 |
40 | Superpower (5) Ancientpower (5) Curse (10) Metal Claw (35) |
Ancient Tomb | |
 |
40 | Mist Ball (5) Psychic (10) Recover (20) Charm (20) |
Southern Island | Eon Ticket necessary to access the island. Only if Latios was chosen as the Roamer |
 |
40 | Luster Purge (5) Psychic (10) Recover (20) Dragon Dance (20) |
Southern Island | Eon Ticket necessary to access the island. Only if Latias was chosen as the Roamer |
 |
30 | Pound (35) Mega Punch (20) Metronome (10) Transform (10) |
Faraway Island | Old Sea Map necessary to access the island. |
 |
30 | Knock Off (20) Pursuit (20) Psychic (10) Swift (20) |
Birth Island | Aurora Ticket necessary to access the island. |
 |
70 | Recover (20) Hydro Pump (5) Rain Dance (5) Swift (20) |
Navel Rock | Mystic Ticket necessary to access the island. |
 |
70 | Recover (20) Fire Blast (5) Sunny Day (5) Swift (20) |
3.4. Soft-reset hunts.
| Pokémon | Level | Location | Notes |
|---|---|---|---|
 |
5 | Route 101 | Starter |
 |
|||
 |
|||
 |
20 | Mirage Tower Desert Underpass |
Choose between Root and Claw Fossils in Mirage Tower. The other will appear in the Desert Underpass. Can be revived at Devon Corporation (Rustboro City) |
 |
|||
 |
5 | Mossdeep City | Steven leaves it in his house after beating the Pokémon League |
 |
5 | Professor Birch's Lab | After completing the Hoenn Pokédex. Can only choose one |
 |
|||
 |
3.5. Sudowoodo and Kecleon.
Kecleon is a very iconic Pokémon in Hoenn, being an invisible one a roadblock after Fortree City you have to get rid of, prompting a small cutscene along with Steven to make it appear. Sudowoodo is also a memorable encounter, a reward for those curious players who explored the Battle Frontier (while also blocking the way to the Artisan Cave and its Smeargles). These Pokémon can be hunted with a very special method: knocking yourself out during the battle.
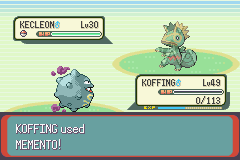
The process is very simple; first, you will need a Pokémon that knows the move Memento. The most accessible Pokémon that learns it at the earliest level is Koffing, at level 49. You don't have to worry much about Kecleon or Sudowoodo being faster than you; their levels (30 and 40) aren't too high, and their speed stat is next to nothing. Another alternative is using a Heart Scale on Latios to remember Memento, which is the fastest way to setup but requires you to have caught Latios.
Step two of the preparation is not having any other Pokémon in your team aside from the Memento user. This will make you black out after it faints, sending you directly to the Pokémon Center. You will only have to walk back to Kecleon or Sudowoodo to do another encounter.
Remember to interact with the Lilycove paintings at the beginning of each session if you want to get new frames.
Kecleon

Data:
Level: 30
Ability: Color Change
Nature: random
Moves:
Faint Attack (20)
Fury Swipes (15)
Psybeam (20)
Screech (40)
Sudowoodo

Data:
Level: 40
Ability: Sturdy/Rock Head
Nature: random
Moves:
Flail (15)
Low Kick (20)
Rock Slide (10)
Block (5)
4. Events.
Aside from the typical Pokémon distribution events, there are a few where special items were given instead, which will take you to a new location where a legendary Pokémon can be found (and hunted).
These events are no longer available for obvious reasons; they were only distributed in specific locations around the world due to the lack of online services for these games. There are still some ways to obtain these events, which require either external devices or following a lot of steps for specific glitches. With the Mystery Gift Tool , you can "distribute" the events into your save file by yoursel, on multiple platforms (PC, GameCube/Wii, Nintendo DS).
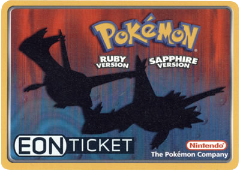
4.1. Southern Island.
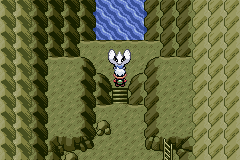
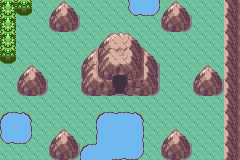
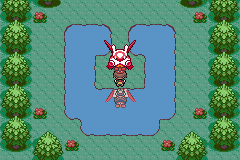
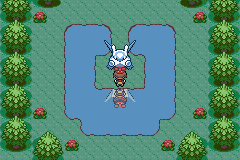
It is a small island located in the south of the Hoenn region and is only available in Ruby, Sapphire, and Emerald. This island can be reached by giving the Eon Ticket to the S.S. Tidal's captain. As soon as you reach it, you will notice the lack of NPCs or wild Pokémon; it's just a small forest leading you to the main area.
A small, round rock will be the only thing present, surrounded by a small puddle of water. Here, Latios or Latias will pay you a visit, depending on the game version. In Ruby, Latias will appear, while in Sapphire, it will be Latios. In Emerald, this is different. After beating the Pokémon League, the mother will ask you about a Pokémon that appeared on TV and its colour. Depending on your answer, either Latias or Latios will appear roaming through the region (red and blue being the choices, respectively), leaving the other to appear on the Southern Island. The one on the island can be hunted through runaways like the other legendaries. This is the recommended way to hunt Latios or Latias in Emerald.
In order to catch them easily, you can use Taunt to stop them from recovering with a Dark-type Pokémon, which will be immune to their attacking moves. Be careful, as they won't be able to use two of their moves if you use this approach, and the rest have low PP.
| Ruby | Sapphire |
|---|---|
|
|
| Emerald | |
|
The opposite of the one roaming through Hoenn |
|
| Moves (Latias) | Moves (Latios) |
| Mist Ball (5) Psychic (10) Recover (20) Charm (20) |
Luster Purge (5) Psychic (10) Recover (20) Dragon Dance (20) |
4.2. Faraway Island.
This time, this place is located in an unknown region far from Hoenn, although it is only reachable in Emerald. It makes sense when you consider its name. The item needed to reach this island is the Old Sea Map, which was only given in Japan originally. The S.S. Tidal will be needed again, but this time, no one is up for helping, as the island is way too far, but Mister Briney will appear and promptly take you on the trip.
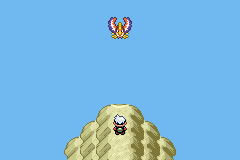
This island has a small forest area with very tall grass, where Mew will be playing around, hiding, and making you chase it. This process can be a bit tedious, so it's better to follow an optimized path that will let you reach Mew quickly. You will need to repeat this process every time you want to check a new Mew, as the most efficient way to hunt it is through runaways.

Mew
Data:
Level: 30
Ability: Synchronize
Nature: random
Moves:
Pound (35)
Mega Punch (20)
Metronome (10)
Transform (10)
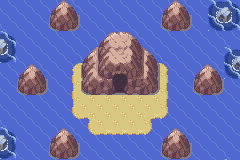
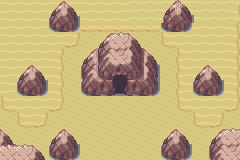
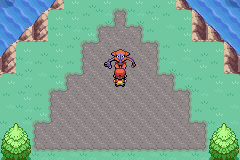
4.3. Birth Island.
Another island located in the Sevii Islands, this time south of Six Island and east of Seven Island, is accessible in Emerald, FireRed, and LeafGreen with the Aurora Ticket. It has a triangle shape, and it seems smaller than the previous two, with only three trees on it. Aside from that, a dark-coloured, triangular rock appears in the middle. This stone will move around each time that it's interacted with, while increasingly becoming more red. This puzzle consists of touching the triangle while taking the fewest steps possible. The button A must be pressed at the end of each set of steps.: