


 1. Generation 1.
1.1. Shininess determined by DVs.
Contrary to what it looks like, Shiny Pokémon do exist in Generation 1, at least in a way. There are no Shiny sprites in these games, but that doesn't mean that they're not there, hidden, waiting for someone to see through the lack of different coloration.
As you may already know, IVs influence the stats of a Pokémon; a higher number usually means they are better suited for battle than others of the same species. In Generation 1, DVs take on this role, as IVs as we know them didn't exist until Generation 3. They range from 0 to 15. Another difference with IVs is that the special attack and the special defense share the same DV, "Special".
The most important thing for Shiny hunting, though, is that DVs determine whether a Pokémon is Shiny or not. This means that, even if it cannot be seen in its original game, a Pokémon from Generation 1 can be sent to Generation 2 and turn out to be Shiny. A Pokémon will be shiny only if its DVs match these conditions:
| Attack DV | Defense, Speed and Special DVs |
|---|---|
| Must be 2, 3, 6, 7, 10, 11, 14, or 15. | Must be 10. |
There are 8 shiny DV sets out of the total 65,536 possible DV combinations, essentially resulting in a 1 in 8192 chance of being shiny, the odds we are all used to in the old games. The process of hunting in Generation 1 involves checking the stats, making it stand out over all other types of full-odds hunting. But as cool as this sounds, there are some "limitations".
Due to the games not being able to create true random numbers, wild Pokémon found in tall grass, caves, or surfing cannot have a DV combination that results in a Shiny Pokémon when transferred to Generation 2. On the other hand, these pseudorandom numbers can give Pokémon found while fishing, obtained through gifts, interactable Pokémon (those that appear on the overworld and can be talked to before starting the battle), and in-game traded Pokémon any set of DVs, giving them the usual 1 in 8192 chance of being Shiny. This is one of the few instances in the entire franchise where a Pokémon received through a trade with an NPC can be Shiny. As you can see, even if the hunts are slightly more limited (when it comes to the number of targets) because of this interaction with the random numbers, it still makes for very special situations.
-
Game Corner Pokémon can be purchased with coins, which are obtained through playing on slot machines or exchanging them for money. These Pokémon can be obtained as many times as you want, as long as you have the coins for them. Some examples include Dratini and Porygon.
-
Gifts: Pokémon that are given by an NPC or found as an item Poké Ball. For example, the starters or Eevee.
-
In-game trades: Pokémon that are received through a trade with an NPC in exchange for one of yours. For example, Mr. Mime or Lickitung.
-
Interactable Pokémon: they appear with their own sprite in the overworld and can usually be talked to, starting a battle. For example, the Legendaries.
-
Fishing: any Pokémon that appears in the wild by fishing. For example, Magikarp or Shellder.
1.2. Figuring out Shiny stats.
To know if your Pokémon is Shiny, you will obviously need to find out its DVs. If you have used any IV calculator in the past, you know that the lower the level of your Pokémon, the more imprecise the calculation will be. This is also true for DVs; you may have to level up your target a few times before having the exact stat. But that process takes way too long for a hunt. That's why, with the help of this Generation 1 hunting tool by Blue Moon Falls, you can check the stats faster than with a normal calculator; you will only need to see if your Pokémon stats match any of the possible Shiny ones. You can find all the information on how to use it on the same page.
1.3. Game Corner.
Located in Celadon City, the Game Corner is a casino where coins are obtained by purchasing them in exchange for money or by gambling them in the slots machines. The building is owned by Team Rocket, which also gives it the Rocket Game Corner name.
In the prize corner, you can buy TMs with the coins, but most importantly, Pokémon. These Pokémon are easy and straight-forward to hunt. The list is different depending on the version and language:
| Pokémon Red Version (EN) & Pocket Monsters: Red (JP) | Pokémon Blue Version (EN) & Pocket Monsters: Green (JP) | ||||||
|---|---|---|---|---|---|---|---|
| Pokémon | Shiny (Gen 2) | Coins | Level | Pokémon | Shiny (Gen 2) | Coins | Level |
 |
 |
180 | 9 | |
|
120 | 6 |
 |
 |
500 | 18 | |
|
750 | 12 |
 |
 |
1200 | 17 |  |
 |
1200 | 17 |
 |
 |
2800 | 18 |  |
 |
2500 | 20 |
 |
 |
5500 | 25 | |
|
4600 | 24 |
 |
 |
9999 | 26 | |
|
6500 | 18 |
| Pocket Monsters: Yellow (JP) & Pokémon Yellow Version (EN) | Pocket Monsters: Blue (JP) | ||||||
|---|---|---|---|---|---|---|---|
| Pokémon | Shiny (Gen 2) | Coins | Level | Pokémon | Shiny (Gen 2) | Coins | Level |
 |
|
180 | 9 |  |
|
120 | 6 |
 |
 |
500 | 18 |  |
 |
750 | 12 |
 |
 |
1200 | 17 |  |
 |
1200 | 17 |
 |
|
2800 | 18 |  |
 |
2500 | 20 |
 |
|
5500 | 25 |  |
 |
4600 | 24 |
 |
|
9999 | 26 |  |
|
6500 | 18 |
1.4. In-game trades.
Some NPCs will want to trade Pokémon with you, which can also be hunted. Some of the Pokémon may evolve during the trade, so you may not exactly get the same target you were expecting at first. They are different depending on the version and the language.
| Pocket Monsters: Red & Pocket Monsters: Green (JP) | ||||
|---|---|---|---|---|
| You give | You get | Shiny (Gen 2) | Nickname | Location |
|
 |
 |
バリバリ (Baribari) |
Route 2 |
 |
 |
 |
チャッピー (Chappy) |
Underground Path (Routes 5 - 6) |
|
|
|
テリー (Terry) |
Route 11 |
 |
 |
 |
なめぞう (Namezō) |
Route 18 |
 |
 |
 |
まさこ (Masako) |
Cerulean City |
 |
 |
 |
おしょう (Oshō) |
Vermilion City |
 |
 |
 |
おマル (Omaru) |
Pokémon Lab |
 |
 |
 |
リンダ (Linda) |
Pokémon Lab |
 |
 |
 |
パウーン (Paūn) |
Pokémon Lab |
| Pocket Monsters: Blue (JP) | ||||
|---|---|---|---|---|
| You give | You get | Shiny (Gen 2) | Nickname | Location |
 |
 |
|
まさる (Masaru) |
Route 2 |
 |
 |
 |
ロモたん (Romo-tan) |
Underground Path (Routes 5 - 6) |
 |
 |
 |
ロダン (Rodan) |
Route 11 |
 |
 |
 |
ぎゅうた (Gyūta) |
Route 18 |
 |
 → →

|
 |
ゴーすけ (Ghosuke) |
Cerulean City |
 |
 |
|
アッカ (Akka) |
Vermilion City |
 |
 → →

|
 |
さぶろう (Saburō) |
Pokémon Lab |
 |
 |
 |
オスカル (Oscar) |
Pokémon Lab |
 |
 |
 |
オスカル (Oscar) |
Pokémon Lab |
| Pokémon Red Version & Pokémon Blue Version (EN) | ||||
|---|---|---|---|---|
| You give | You get | Shiny (Gen 2) | Nickname | Location |
|
|
|
MARCEL | Route 2 |
 |
 |
 |
SPOT | Underground Path (Routes 5 - 6) |
 |
 |
|
TERRY | Route 11 |
 |
 |
|
MARC | Route 18 |
 |
 |
|
LOLA | Cerulean City |
 |
|
|
DUX | Vermilion City |
 |
 |
|
DORIS | Pokémon Lab |
 |
 |
|
CRINKLES | Pokémon Lab |
 |
|
|
SAILOR | Pokémon Lab |
| Pocket Monsters: Yellow (JP) & Pokémon Yellow Version (EN) | ||||
|---|---|---|---|---|
| You give | You get | Shiny (Gen 2) | Nickname | Location |
 |
 |
|
マイム (Mime) MILES |
Route 2 |
 |
 → →

|
 |
リッキー (Ricky) RICKY |
Underground Path (Routes 5 - 6) |
 |
 |
 |
ぐりお (Gurio) GURIO |
Route 11 |
 |
 |
 |
つんつん(Tsuntsun) SPIKE |
Route 18 |
 |
 |
 |
ごんすけ(Gonsuke) BUFFY |
Pokémon Lab |
 |
 |
 |
セザンヌ(Cezanne) CEZANNE |
Pokémon Lab |
 |
 |
 |
ベタぼう (Betabō) STICKY |
Pokémon Lab |
1.5. Gift Pokémon.
Aside from trading, some people may directly gift you a Pokémon, aside from the starters you get at the beginning of the game. These are usually very rare targets that cannot be normally found any other way.
| Pokémon | Shiny (Gen 2) | Location | Notes |
|---|---|---|---|
 |
 |
Professor Oak's Laboratory Pallet Town |
Red, Green, and Blue omly |
 |
 |
||
 |
 |
||
 |
|
Yellow only | |
 |
|
Cerulean City | Yellow only. Pikachu's friendship must be at least 147 |
 |
|
Route 24 | Yellow only |
 |
|
Vermilion City | Yellow only. After receiving the Thunder Badge |
 |
 |
Celadon Mansion rooftop | As an item Poké Ball (rooftop room) |
 |
 |
Fighting Dojo, Saffron City | After beating Karate master Koichi. Can only choose one |
 |
 |
||
 |
 |
Route 4 Pokémon Center | Purchased for 500 money |
 |
 |
7th floor of Silph Co. | After beating Blue |
 |
 |
Mt. Moon | Can choose one fossil after beating a Super Nerd. Must be revived at Cinnabar Lab on Cinnabar Island |
 |
 |
||
 |
 |
Pewter Museum of Science | Secret area of the lab, accessed by using Cut |
1.6. Pokémon found fishing.
| Pokémon Red & Blue | ||||
|---|---|---|---|---|
| Pokémon | Shiny (Gen 2) | Location | ||
| Old Rod | Good Rod | Super Rod | ||
 |
 |
- | - | Routes 24 and 25 Cerulean City, Cerulean Gym, and Safari Zone |
|
|
- | All water tiles + Gym statues | Pallet Town, Viridan City, and Route 22 |
|
 |
- | - | Route 10 and Celadon City |
 |
 |
- | - | Routes 12, 13, 17, and 18 Pallet Town and Viridian City |
|
|
- | - | Route 10, Celadon City, and Safari Zone |
|
 |
- | - | Route 23 and Cerulean Cave |
 |
 |
- | - | Routes 6, 11, 19, 20, and 21 Vermilion City, Seafoam Islands, and Cinnabar Island |
|
|
- | - | Routes 6, 11, 12, 13, 17, 18, 24, and 25 Cerulean City, Vermilion City, Fuchsia City, and Safari Zone |
 |
 |
- | - | Route 23 and Cerulean Cave |
|
|
- | - | Routes 19, 20, and 21 Seafoam Islands, and Cinnabar Island |
 |
 |
- | - | Route 23 and Cerulean Cave |
 |
 |
- | All water tiles + Gym statues | Routes 12, 13, 17, 18, 19, 20, 21, 22, 24, and 25 Cerulean City, Fuchsia City, Seafoam Islands, and Cinnabar Island |
 |
 |
- | - | Route 23, Fuchsia City, and Cerulean Cave |
 |
 |
- | - | Routes 19, 20, and 21 Cinnabar Island and Seafoam Islands |
|
|
All water tiles + Gym statues | - | Routes 12, 13, 17, and 18 Fuchsia City |
 |
|
- | - | Safari Zone |
| Pokémon Yellow | ||||
|---|---|---|---|---|
| Pokémon | Shiny (Gen 2) | Location | ||
| Old Rod | Good Rod | Super Rod | ||
 |
|
- | All water tiles + Gym statues | Routes 22 and 23 Viridian City |
 |
|
- | - | Routes 22 and 23 |
 |
|
- | - | Routes 11, 13, 17, 18, 19, 20, and 21 Pallet Town, Vermilion City, and Cinnabar Island |
 |
 |
- | - | Routes 19, 20, and 21 |
 |
|
- | - | Routes 17 and 18 Vermilion City Harbor |
 |
|
- | - | Routes 10 and 25 Seafoam Islands |
 |
|
- | - | Routes 10 and 25 |
 |
|
- | - | Routes 10, 11, 12, and 13 Vermilion City |
 |
|
- | - | Routes 12 and 13 |
 |
|
- | All water tiles + Gym statues | Routes 6 and 24 Cerulean City, Celadon City, Cerulean Cave |
 |
|
- | - | Route 24, Cerulean City, and Cerulean Cave |
 |
|
- | - | Routes 19, 20, and 21 Pallet Town, Vermilion City Harbor, Cinnabar Island, and Seafoam Island |
 |
|
All water tiles + Gym statues | - | Fuchsia City and Safari Zone |
 |
 |
- | - | Fuchsia City |
 |
|
- | - | Safari Zone |
 |
|
- | - | Safari Zone |
1.7. Interactable Pokémon.
Pokémon that can be found in the overworld. You can interact with them, prompting a battle after a small dialogue. They are usually legendary Pokémon.
| Pokémon | Shiny (Gen 2) | Level | Moves | Location | Notes |
|---|---|---|---|---|---|
 |
 |
30 |
Headbutt (15) Rest (10) Amnesia (20) |
Route 12 Route 16 |
Requires the Poké Flute. There are 2 of them in the region |
 |
 |
50 |
Peck (35) Ice Beam (10) |
Seafoam Islands B4F | |
 |
 |
50 |
ThunderShock (30) Drill Peck (20) |
Power Plant | |
 |
 |
50 |
Peck (35) Fire Spin (15) |
Victory Road 2F | |
 |
 |
70 |
Swift (20) Psychic (10) Barrier (30) Recover (20) |
Cerulean Cave B1F | After beating the Pokémon League |
1.8. Transfering to Generation 2.
On the second floor of every Pokémon Center, there is a machine called the Time Capsule, which will let you send any Pokémon to Generation 2. You will be able to use it after having met Bill in Ecruteak City and letting 24 hours pass. The Time Capsule will work similarly to a Generation 1 trade. The Virtual Console games also have this function.
The Pokémon that come from Generation 1 will be holding an item determined by its catch rate. The full list of items can be found here. There are some more less-known, weird items like the Brick Piece (Machop) or the Polkadot Bow (Jigglypuff) exclusive to this mechanic.
1.9. Transfering to Generation 7.
In order to transfer from Generation 1 or 2 to Generation 7, you will need the Poké Transporter and the Pokémon Bank. Through this journey across generations, your Pokémon will suffer some changes due to the new mechanics added in later games. For example, it will always have its hidden ability if it has one. It will also have 3 random stats set to 31 IVs (don't worry, this will not make the Pokémon non-Shiny). These characteristics are generated out of your control, but there is one thing that you have a "choice" on: nature. Getting the right nature can be important if you decide to get all the ribbons possible with your Shiny.
The nature of the Pokémon will depend on the current experience points it has. It is calculated by dividing the experience by 25 and using the remainder with the following table (this is also known as modulo):
| Remainder | Nature | Remainder | Nature |
|---|---|---|---|
| 0 | Hardy | 13 | Jolly |
| 1 | Lonely | 14 | Naive |
| 2 | Brave | 15 | Modest |
| 3 | Adamant | 16 | Mild |
| 4 | Naughty | 17 | Quiet |
| 5 | Bold | 18 | Bashful |
| 6 | Docile | 19 | Rash |
| 7 | Relaxed | 20 | Calm |
| 8 | Impish | 21 | Gentle |
| 9 | Lax | 22 | Sassy |
| 10 | Timid | 23 | Careful |
| 11 | Hasty | 24 | Quirky |
| 12 | Serious |
You can also know the nature without calculating anything, just by checking the last two digits of the experience points.
| Last two digits | Nature | |||
|---|---|---|---|---|
| 0 | 25 | 50 | 75 | Hardy |
| 1 | 26 | 51 | 76 | Lonely |
| 2 | 27 | 52 | 77 | Brave |
| 3 | 28 | 53 | 78 | Adamant |
| 4 | 29 | 54 | 79 | Naughty |
| 5 | 30 | 55 | 80 | Bold |
| 6 | 31 | 56 | 81 | Docile |
| 7 | 32 | 57 | 82 | Relaxed |
| 8 | 33 | 58 | 83 | Impish |
| 9 | 34 | 59 | 84 | Lax |
| 10 | 35 | 60 | 85 | Timid |
| 11 | 36 | 61 | 86 | Hasty |
| 12 | 37 | 62 | 87 | Serious |
| 13 | 38 | 63 | 88 | Jolly |
| 14 | 39 | 64 | 89 | Naive |
| 15 | 40 | 65 | 90 | Modest |
| 16 | 41 | 66 | 91 | Mild |
| 17 | 42 | 67 | 92 | Quiet |
| 18 | 43 | 68 | 93 | Bashful |
| 19 | 44 | 69 | 94 | Rash |
| 20 | 45 | 70 | 95 | Calm |
| 21 | 46 | 71 | 96 | Gentle |
| 22 | 47 | 72 | 97 | Sassy |
| 23 | 48 | 73 | 98 | Careful |
| 24 | 49 | 74 | 99 | Quirky |
The easiest way to obtain the exact amount of experience points that you want is by leaving your Pokémon in the daycare and taking steps, as each of them gives it 1 experience point. The previous tables can also be used to transfer from Generation 2 to 7, although you may have to find other methods to obtain experience.
 2. Generation 2.
 Returning mechanics and other important information.
Shininess is still determined by DVs.
2.1. Game Corner.
All of the slot machines in the Game Corner normally have a 1 in 6 chance of entering a special mode that will give you better odds of winning. This mode will be determined when starting the machine and will last until the player quits. But there's a singularity in both Celadon and Goldenrod Game Corners: there's a lucky slot machine that will always have this mode activate.
The game doesn't give any clear indications of which one is the lucky one out of all the ones inside the building, but there are some hints. In the Goldenrod Game Corner, there's an NPC that will talk about the machine he is using yielding a higher amount of coins than any other, indicating the lucky machine. On the other hand, in the Celadon Game Corner, there will be two NPCs mentioning something similar, but none of their machines are the lucky ones.
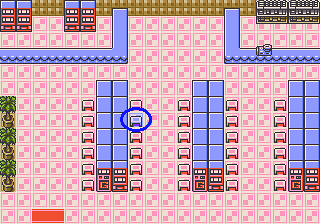
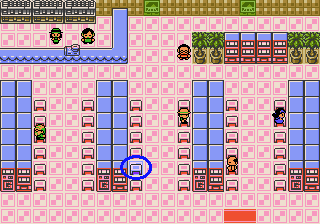
These two machines are always occupied, except in the mornings (04:00–09:59). Talk about the early bird getting the worm. But even then, grinding money in the Pokémon League with an Amulet Coin and buying coins in the Game Corner is faster than gambling.
| Pokémon | Level | Full team | Coins | Game |
|---|---|---|---|---|
| Goldenrod | ||||
|
10 (GS) 5 (C) |
Can buy 5 at once 1000 coins (GS) 500 coins (C) |
200 (GS) 100 (C) |
All |
 |
10 | Can buy 5 at once 3500 coins |
700 | Gold |
 |
10 | Can buy 5 at once 3500 coins |
700 | Silver |
 |
10 | Can buy 4 at once 8400 coins |
2100 | Gold and Silver |
 |
15 | Can buy 5 at once 4000 coins |
800 | Crystal |
 |
15 | Can buy 5 at once 7500 coins |
1500 | Crystal |
| Celadon | ||||
 |
15 | Can buy 3 at once 9999 coins |
3333 | Gold and Silver |
 |
15 | Can only buy 1 at once | 6666 | Gold and Silver |
|
20 (GS) 15 (C) |
Can only buy 1 at once | 9999 (GS) 5555 (C) |
All |
|
25 | Can buy 4 at once 8888 coins |
2222 | Crystal |
 |
40 | Can only buy 1 at once | 8888 | Crystal |
2.2. Received and Interactable Pokémon.
| Pokémon | Level | Moves | Location | Notes |
|---|---|---|---|---|
| Received Pokémon | ||||
 |
5 | Tackle (35) Growl (40) |
New Bark Town (Professor Elm's Lab) |
Starter. Females cannot be shiny |
 |
5 | Tackle (35) Leer (30) |
||
 |
5 | Scratch (35) Leer (30) |
||
 |
10 | Peck (35) Growl (40) Leer (30) |
Goldenrod City | Given "temporarily during" a quest. Can be kept forever. Nicknamed KENYA |
|
20 | Tackle (35) Sand-Attack (15) Growl (40) |
Goldenrod City | After meeting Bill in Ecruteak City |
 |
5 | Growl (40) | Violet City | Is given as an egg after beating Falkner |
 |
15 | Constrict (35) Withdraw (40) Wrap (20) Encore (5) |
Cianwood City | Given "temporarily during" a quest. Can be kept forever. Nicknamed SHUCKIE |
 |
10 | Tackle (35) | Mt. Mortar | Given after beating the Karate King |
|
15 | Wrap (20) Thunder Wave (20) Twister (20) Extremespeed (5) |
Dragon's Den | Crystal only. After beating Clair and answering correctly the monk's test |
|
15 | Wrap (20) Thunder Wave (20) Twister (20) Leer (30) |
Dragon's Den | Crystal only. After beating Clair and answering icorrectly the monk's test |
| Interactable Pokémon | ||||
 |
21 | Tackle (35) Smog (20) Selfdestruct (5) Sludge (20) |
Mahogany Town Rocket's Hideout |
They can knock themselves out. |
 |
23 | Tackle (35) Screech (40) SonicBoom (20) Selfdestruct (5) |
||
 |
21 | Defense Curl (40) Rock Throw (15) Magnitude (30) Selfdestruct (5) |
||
|
21 | Tackle (35) Screech (40) SonicBoom (20) Selfdestruct (5) |
It can knock itself out. Will respawn immediately if you run away (GS only) |
|
|
20 | Growl (40) Sing (15) Mist (30) Body Slam (15) |
Union Cave | Every Friday on the basement floor. Need Surf to reach it |
|
50 | Rest (10) Snore (15) Body Slam (15) Rollout (20) |
Vermilion City | Requires EXPN Card from Lavender Town |
 |
20 | Rock Throw (15) Mimic (10) Flail (15) Low Kick (20) |
Route 36 | Requires Squirtbottle (obtainable in Goldenrod City after defeating Whitney) |
2.3. Legendaries.
| Pokémon | Level | Moves | Location | Notes |
|---|---|---|---|---|
| Gold | ||||
 |
70 | Recover (20) Hydro Pump (5) Rain Dance (5) Swift (20) |
Whirl Islands | Requires the Silver Wing (obtainable in Pewter City, Kanto) |
 |
40 | Sacred Fire (5) Safeguard (25) Gust (35) Recover (20) |
Tin Tower | |
 |
40 | Leer (30) ThunderShock (30) Roar (20) Quick Attack (30) |
Roaming the region | |
 |
40 | Leer (30) Ember (25) Roar (20) Fire Spin (15) |
Roaming the region | |
 |
40 | Leer (30) Water Gun (25) Roar (20) Gust (35) |
Roaming the region | |
| Silver | ||||
 |
40 | Aeroblast (5) Safeguard (25) Gust (35) Recover (20) |
Whirl Islands | |
 |
70 | Recover (20) Fire Blast (5) Sunny Day (5) Gust (35) |
Tin Tower | Requires the Rainbow Wing (obtainable in Pewter City, Kanto) |
 |
40 | Leer (30) ThunderShock (30) Roar (20) Quick Attack (30) |
Roaming the region | |
 |
40 | Leer (30) Ember (25) Roar (20) Fire Spin (15) |
Roaming the region | |
 |
40 | Leer (30) Water Gun (25) Roar (20) Gust (35) |
Roaming the region | |
| Crystal | ||||
 |
40 | Recover (20) Hydro Pump (5) Rain Dance (5) Gust (35) |
Whirl Islands | Requires the Silver Wing (obtainable in Pewter City, Kanto) |
 |
70 | Recover (20) Fire Blast (5) Sunny Day (5) Gust (35) |
Tin Tower | Requires the Rainbow Wing (after catching the legendary beasts and entering the Hall of Fame) |
 |
40 | Leer (30) ThunderShock (30) Roar (20) Quick Attack (30) |
Roaming the region | |
 |
40 | Leer (30) Ember (25) Roar (20) Fire Spin (15) |
Roaming the region | |
 |
40 | Leer (30) BubbleBeam (20) Roar (20) Gust (35) |
Tin Tower | |
 |
30 | Heal Bell (5) Safeguard (25) AncientPower (5) Future Sight (15) |
Ilex Forest | Requires the GS Ball. Unobtainable legitimately in the original cartridge. Given in Virtual Console versions |
2.4. Pokémon with the 7:1 gender ratio.
Gender in Generation 2 is determined by the attack DV by comparing it with their gender ratio. A Pokémon is female when its attack DV is less than or equal to its gender ratio. If the number is higher, it will be male. Genderless Pokémon don't use this calculation.
| Ratio (M:F) | Male DVs | Female DVs | Male chance | Female chance |
|---|---|---|---|---|
| Always male | 0-15 | - | 100% | 0% |
| Always female | - | 0 - 15 | 0% | 100% |
| 7:1 | 2 - 15 | 0 - 1 | 87.5% | 12.5% |
| 3:1 | 4 - 15 | 0 - 3 | 75% | 25% |
| 1:1 | 8 - 15 | 0 - 7 | 50% | 50% |
| 1:3 | 12 - 15 | 0 - 11 | 25% | 75% |
As you can see, a species with a 7:1 ratio will never have females with an attack DV higher than 1, which is not enough for the attack DV requirements of a Shiny Pokémon (2, 3, 6, 7, 10, 11, 14, or 15). This means that the female Pokémon of these species will never be Shiny. These species are:


2.5. Shiny Unown letters limitations.
The Unown letter is determined by combining the two center bits of the DVs of an Unown, except HP (which is calculated from the other stats). The group of bits is translated to decimal notation, divided by ten, and finally rounded down to remove the decimal numbers. The resulting number will range between 0 and 25, one number for each Unown letter.
| Attack | Defense | Special | Speed | |
|---|---|---|---|---|
| DV | 13 | 2 | 6 | 10 |
| Center bits | 1101 | 0010 | 0110 | 1010 |
| Combination | 10011101 | |||
| Number | 157 | |||
| Divided by 10 | 15.7 | |||
| Rounded down | 15 | |||
| Unown letter |  |
|||
Due to the letter mechanic being tied to the DVs, not all letters can be Shiny. More specifically, only Unowns I and V will be able to appear as Shiny. An ironic coincidence if you think about the fact that the Generation 3+ version of DVs are IVs.
The possible Shiny DVs of each form (I and V) will then be:
| Form | HP | Attack | Defense | Special | Speed |
|---|---|---|---|---|---|
 |
0 | 2 | 10 | 10 | 10 |
| 8 | 3 | 10 | 10 | 10 | |
| 0 | 10 | 10 | 10 | 10 | |
| 8 | 11 | 10 | 10 | 10 | |
 |
0 | 6 | 10 | 10 | 10 |
| 8 | 7 | 10 | 10 | 10 | |
| 0 | 14 | 10 | 10 | 10 | |
| 8 | 15 | 10 | 10 | 10 |
2.6. Wild Pokémon running away.
Only in this generation, a small number of Pokémon have the chance of fleeing from a regular, wid battle. Some kind of Safari Zone wannabes. Either way, this is portrayed in the existence of the Rapid Ball, which has a x4 catch rate when used on a Pokémon that has a chance to run away from battle, if it weren't for the fact that it's not coded correctly. Still, the theory holds up.
Out of all of the following Pokémon that can run away, the Rapid Ball gets a boost only with Magnemite, Grimer, and Tangela.
| 10% chance to flee |
|---|


|
| 50% chance to flee |


|
There are some other Pokémon that are also programmed to flee, but they can't appear in the wild (Eevee, Porygon, Articuno, Zapdos, Moltres, Togetic, and Umbreon). The best way to stop this Pokémon from fleeing is to use a Jynx with Mean Look and Lovely Kiss, although any fast Pokémon with Mean Look can also work. If you want to know more about what to use against these fleeing Pokémon, check out the Generation 2 section of the Utility Pokémon guide.
2.7. Mass Outbreaks.
Some Pokémon have special appearances where their encounter chance is increased significantly in locations where they are usually found 1% of the time. In order to find an outbreak, you must be called by some specific trainers in your PokéGear. There can only be one swarm per day.
Making one of the trainers call can be a tedious task, but there's an easy way to force the outbreak:
-
Delete all trainers from the contact list that aren't relevant to the swarm.
-
Talk repeatedly with the mother in New Bark Town to toggle daylight savings time on and off. There's a 50% chance to trigger a call every time daylight savings time is changed.
| Pokémon | Location | Trainer call | Trainer location | Game | Percentage |
|---|---|---|---|---|---|
 |
Mt. Mortar | Hiker Parry | Route 45 | Gold and Silver | 40% |
 |
Route 35 | Bug Catcher Arnie | Route 35 | All | 30% |
 |
Dark Cave (Route 31) | Hiker Anthony | Route 33 | All | 40% |
 |
Route 38 | Schoolboy Chad | Route 38 | Gold and Silver | 30% |
 |
Route 32 | Fisher Ralph | Route 32 | All | 15% (Old Rod) 65% (Good Rod) 100% (Super Rod) |
 |
Route 44 | Fisher Wilton | Route 44 | Gold and Silver | 15% (Old Rod) 65% (Good Rod) 100% (Super Rod) |
The increased encounter chance of some outbreaks can be taken further by using a repel trick:
| Pokémon | Repel trick | Chance | Encounter rate | Other Pokémon |
|---|---|---|---|---|
|
No repel trick that increases the percentage | |||
|
Level 13 | 66.67% | 15% |
33.33% (day only) (day only) (night only) (night only)
|
|
Level 3 | 53.85% | 65% |
46.15%
|
|
Level 4 | 100% | 5% | - |
|
Not worth a 3.33% increase in exchange of losing Miltank and Tauros |
|||
|
Found 100% of the time with Super Rod | |||
|
Found 100% of the time with Super Rod | |||
2.8. Gyarados and the egg group diagram.
Breeding eggs with a Shiny parent gives very high odds of finding a Shiny in one of those eggs, up to 1 in 64 (depending on gender ratios), which is dramatically better than any other generation, even with the Masuda method! By passing down the defense and special stats of a Shiny, the chances of getting a Shiny offspring skyrocket.
The easiest way to begin generating eggs with a high Shiny chance is by using the red Gyarados from the Lake of Rage and taking advantage of the egg group feature. Gyarados is part of the Water 2 and Dragon egg groups, so it can breed eggs with multiple Pokémon that are also part of them. The process to breed a Pokémon with Gyarados' Shiny genes would be as follows:
This way, you can hunt a wider variety of Pokémon by connecting them through egg groups. Follow this diagram in order to find out the steps you need to take in order to hunt your target:
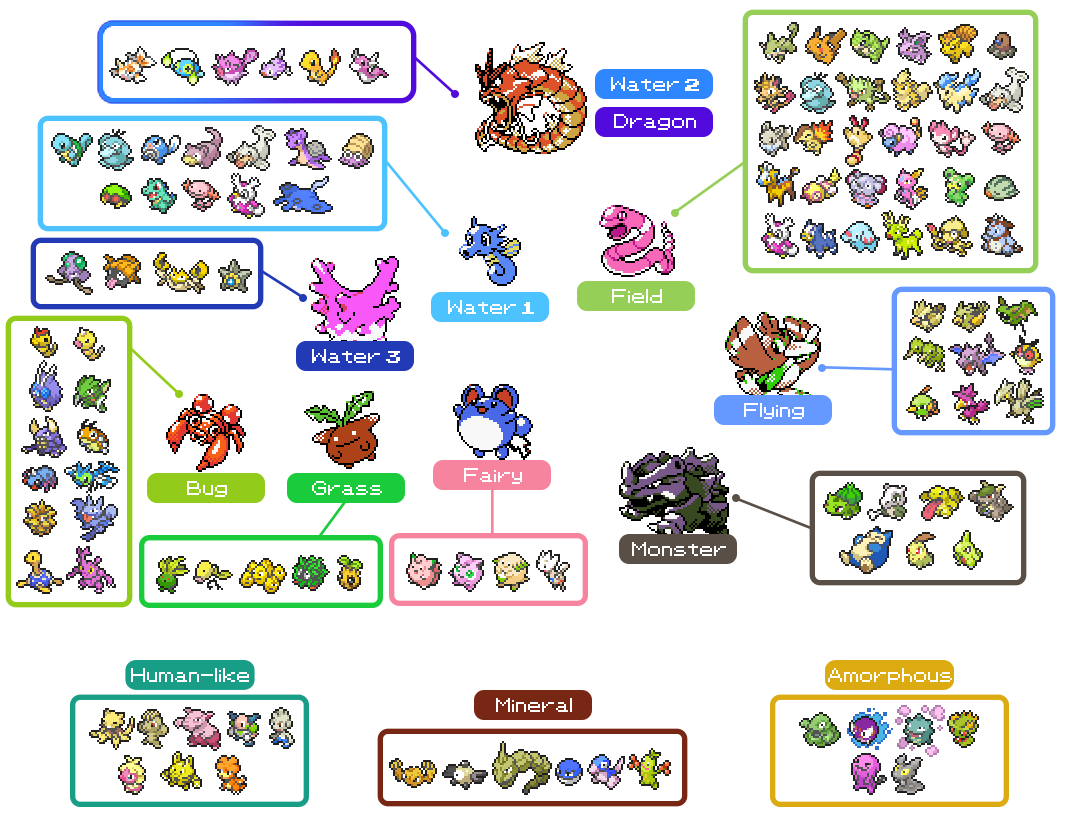
Some targets are not available, as shown previously. This also includes the Pokémon from the Unknown egg group, but that's because they simply can't breed normally. A Shiny from the Human-like, Mineral, or Amorphous group might be needed in order to increase the Shiny odds through breeding. A Shiny Ditto is also a very useful tool to have if you like egg hunting. If you want to know more information about this method, check out Blue Moon Falls' DV Breeding for Shinies page.
2.9. The Odd Egg.
One of the ways that a player can test and find out more about the new egg mechanics from Johto is with the Odd Egg, a gift egg that contains one of many baby Pokémon and will randomly hatch into one of them. They know the special move Dizzy Punch.
Originally, this gift was obtainable in Japan through the use of the Egg Ticket, given away through the Mobile System GB (similarly to the GS Ball and Celebi event). It could be picked up from the daycare man on Route 34. This system has long ceased its functionality, so it can only be obtained through non-legitimate means in these cartridges. The Virtual Console Japanese release did not add any workarounds.
The international release of the game luckily added a new way to obtain this gift without needing external devices or timed events, which works both in cartridges and Virtual Console. The daycare man will give you the egg even if you don't have the Egg Ticket.
The reason why this egg is important is because it can be hunted, and not only that, it also has an increased chance to get a Shiny. To be more specific, there is a 14% chance to find a Shiny in the international versions and a 50% chance in the Japanese one, due to the way DVs influence this trait. This also means that all Pokémon will be female, except Tyrogue. There are two sets of possible DVs.
| SHINY | ||||
|---|---|---|---|---|
| HP | Attack | Defense | Special | Speed |
| 2 | 10 | 10 | 10 | 10 |
| NON SHINY | ||||
| HP | Attack | Defense | Special | Speed |
| 0 | 0 | 0 | 0 | 0 |
There's a 50% chance for the first set of DVs and another 50% for the second in Japanese games. For international versions, the first set will appear 14% of the time, and the second 86%. That is the chance of a Shiny in general with this egg; every species has a different percentage:
| Pokémon | Shiny | Normal % | Shiny % |
|---|---|---|---|
 |
 |
8% | 1% |
 |
 |
16% | 3% |
 |
 |
16% | 3% |
 |
|
10% | 1% |
 |
 |
14% | 2% |
 |
 |
12% | 2% |
 |
 |
10% | 2% |
2.10. Celebi.
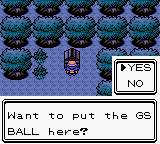
As mentioned before, Celebi was originally distributed in Japan through a special event obtainable only through the Mobile System GB, exclusive to Pokémon Crystal. The GS Ball was the key component to this story, a special Poké Ball made of gold and silver that has also appeared multiple times in the anime.
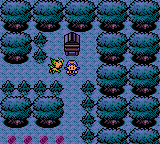
The item was given through the Pokémon News Machine in the Pokémon Communication Center (Goldenrod City). This place was an expanded version of a normal Pokémon Center. After receiving the item, the main task was taking it to Kurt in Azalea Town, who will ask to have it in his possession for a day to analyse it. The next day, he will mention that something strange is going on; the Ilex Forest seems uneasy. The GS Ball will have to be taken to the altar in the forest, where it will be placed, and Celebi will surprise the player with its presence.
This event was intended to be activated in the Goldenrod Pokémon Center on international versions but was never used. Until the Virtual Console version of Crystal came out, which restored the event and let us receive the GS Ball after entering the Hall of Fame. For the Japanese versions, the Communication Center was kept, although the Mobile System GB is no longer needed for the event.
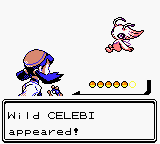
This encounter has been the only legitimate way to hunt a Celebi, as sad as it may sound, so if you were thinking of hunting it in newer games, be prepared for removing Shiny locks or performing glitches.