


 1. Black and White.
 Returning mechanics and other important information.
Illuminate and White Flute work the same way as in Generation 3.
Repel trick can be used to modify encounters.
Other out-of-battle effects for abilities like Magnet Pull work as well.
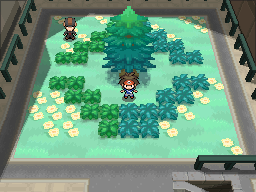
1.1. Dark grass.
This generation introduces a new type of grass in the region: dark grass. Here, higher-level Pokémon will appear, and, most importantly, there’s a chance that a double battle will trigger, in a similar way to the double encounters with an NPC in Sinnoh. The wild Pokémon are selected from a separate list, although they're usually similar to the regular ones.
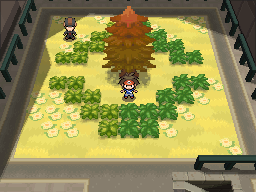
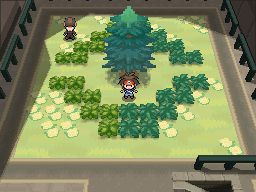
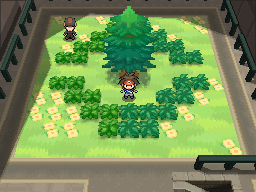
The same mechanics as from Generation 4 apply: Poké Balls can only be thrown when there’s one wild Pokémon left.
Rustling grass cannot appear in this type of grass (it will be explained what it is in one of the following sections).
1.2. Phenomenon.
A new mechanic introduced in Generation 5 related to the steps you take has the possibility of triggering one of these Phenomenon in one of the tiles with wild Pokémon (as long as they are on the screen). In other words, if you are running around while there is, for example, a patch of grass nearby that is visible on your screen, there’s a chance for a Phenomenon to occur. But what are Phenomenon exactly?
Phenomenon are special spots that let you find rare Pokémon or items that are not normally found with other methods. They are always indicated by a visual clue (a shaking grass patch, a shadow in the water, etc.) and a sound, which makes them easy to notice. The Pokémon are usually different at each location, although there are some repeating, common ones like Audino (which is also an excellent EXP farm). At least one gym medal is needed in order to unlock these Phenomenon.
They are not limited by time; they will stay there forever as long as you don’t do one of the following things:
-
Starting a battle with a trainer.
-
Picking up an item.
-
Interacting with an NPC.
-
Going away from the area.
-
An NPC stepping over it.
There can’t be more than one Phenomenon on screen, and if you save and turn off the console while one of them is active, it will not be there when you turn it back on. Opening the menu does not make them disappear.
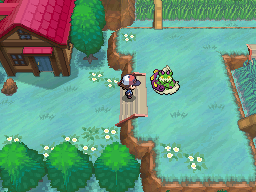
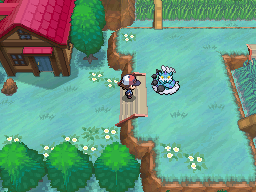
Rustling grass.
When the tall grass shakes by itself, that means that a Pokémon is waiting for you. These spots can only appear in normal tall grass and not in dark grass, as mentioned before, but they do appear in long grass.
The Pokémon that appear in these spots are not usually found through normal encounters. Usually the thing you will see the most is Audino (who doesn’t love an easy EXP farm?) or even Emolga, but sometimes you will find evolved versions of some Pokémon like Mamoswine, or other uncommon ones like the elemental monkeys.
| Pokémon | Location | Game |
|---|---|---|
 |
Almost all places with grass |
|
 |
Route 12 |
|
 |
Route 12 |
|
 |
Routes 5, 9, and 16, and Cold Storage |
|
 |
Giant Chasm (forest) |
|
 |
Route 13 and Giant Chasm (outside) |
|
 |
Almost all places with grass |
|
 |
Routes 11 and 15, and Victory Road |
|
 |
Route 9 |
|
 |
Abundant Shrine |
|
 |
Route 6 and Pinwheel Forest |
|
 |
Abundant Shrine, Lostlorn Forest, and Pinwheel Forest (inside) |
|
 |
Giant Chasm (forest) |
|
 |
Giant Chasm (forest) |
|
 |
Abundant Shrine |
|
 |
Dreamyard |
|
 |
Abundant Shrine |
|

 
|
Lostlorn Forest and Pinwheel Forest (inside) |
|
 |
Route 9 |
|
 |
Routes 10, 15 and 18, and Pinwheel Forest (outside) |
|
 |
Route 10, Cold Storage, and P2 Laboratory |
|
 |
Route 12 |
|
 |
Route 13 and Giant Chasm (outside) |
|
 |
Routes 10, 15 and 18, and Pinwheel Forest (outside) |
|
 |
Route 15 |
|


|
Route 6, 7, and 12, Dragonspiral Tower, and Lostlorn Forest |
|
 |
Route 12 |
|
 |
Abundant Shrine, Lostlorn Forest, and Pinwheel Forest (inside) |
|
 |
Route 14 |
|
Rippling water.
A dark spot may appear sometimes in the water, but this time, it expands the mechanics of the rustling grass. These encounters may be activated by passing on top of them while using Surf or by using the fishing rod on them; this will yield different encounters depending on how you trigger them.
| Surfing | ||
|---|---|---|
| Pokémon | Location | Game |
 |
Routes 4, 17, and 18, P2 Laboratory, and Driftveil City |
|


|
Almost all places with water tiles. |
|


|
Routes 11 and 14 |
|
 |
Route 13 and Undella Town |
|


|
Routes 4, 17, and 18, P2 Laboratory, and Driftveil City |
|
 |
Village Bridge |
|
 |
Undella Town, and Undella Bay (winter) |
|


|
Undella Bay (winter) |
|


|
Giant Chasm |
|
 |
Route 8, Icirrus City, and Moor of Icirrus |
|

 
|
Abundant Shrine |
|


|
Route 13 |
|
 |
Route 8, Icirrus City, and Moor of Icirrus |
|
 |
Undella Town and Undella Bay |
|
 |
Undella Bay |
|
| Fishing | ||
|---|---|---|
| Pokémon | Location | Game |


|
Route 8, Icirrus City, and Moor of Icirrus |
|
|
|
Almost all places with water tiles. |
|


|
Village Bridge |
|
 |
Route 18 and Driftveil City |
|

 
|
Dragonspiral Tower |
|


|
Route 1 |
|


|
Routes 3, 11, and 14, Striaton City, Pinwheel Forest, Abundant Shrine, and Lostlorn Forest |
|
 |
Routes 4 and 13, and Driftveil City |
|
 |
Driftveil City |
|
 |
Routes 17 and 18, and P2 Laboratory |
|
 |
Routes 4 and 13, Driftveil City, Undella Town, and Undella Bay |
|
 |
Undella Town and Undella Bay |
|
 |
Route 6 |
|
 |
Route 6, Challenger’s Cave, Victory Road, Wellspring Cave, and Giant Chasm |
|
 |
Challenger’s Cave, Victory Road, Wellspring Cave, and Giant Chasm |
|
 |
Routes 17 and 18, and P2 Laboratory |
|
 |
Route 4 |
|


|
Routes 17 and 18, and P2 Laboratory |
|


|
Route 13, Undella Town, and Undella Bay |
|
|
Route 8, Icirrus City, and Moor of Icirrus (all on Spring, Summer, and Autumn) |
|
Dust cloud.
Caves also have their own version of Phenomenon, but this time with an extra twist: there’s a chance to get an item instead of a wild encounter, which, for Shiny hunting, can be a mild annoyance. There’s a 40% chance to find a Pokémon, a 50% chance to find a gem, and a 10% chance to find a stone.
There are not many Pokémon that appear this way, but it’s a worthy one to be hunted.
| Pokémon | Location |
|---|---|
 |
Chargestone Cave, Mistralton Cave, Wellspring Cave |
 |
Giant Chasm, Challenger’s Cave, Victory Road |
Bridge shadow.
Two of the bridges in Unova have their own type of Phenomenon. Just the same way as before, if you walk along these bridges, sometimes a shadow will appear on the floor. When stepping on it, there’s an 80% chance to receive a Wing, and a 20% chance to find a Pokémon. These Wings are items that give one EV point to a stat depending on the type, except one of them, the Pretty Wing, which can only be sold. This split between Wing and wild Pokémon gives a second purpose to these hunts, as a side farm of EV points.
| Feather | Stat | Pokémon | Location |
|---|---|---|---|
 Health Wing |
HP |  |
Driftveil Drawbridge |
 Muscle Wing |
Attack | ||
 Resist Wing |
Defense | ||
 Genius Wing |
Special Attack |  |
Marvelous Bridge |
 Clever Wing |
Special Defense | ||
 Swift Wing |
Speed | ||
 Pretty Wing |
- |
1.3. Mass outbreaks.
Time-changing won’t be needed this time to get a new outbreak. Instead, you will only need to make sure that the last time you saved was the previous day, and you will be able to reset the game and get a new outbreak each time. The gates between routes will display which one is active. There is a special case where Croagunk won’t be shown on the screens in winter. This is because Route 8’s water puddles are frozen during that season and won’t trigger any wild encounters.
Mass Outbreak Pokémon will only appear on normal grass, so they won’t be able to be found in double battles.
| Fishing | ||
|---|---|---|
| Pokémon | Location | Game |

|
Route 1 |
|

|
Route 2 |
|

|
Route 3 |
|

|
Route 3 |
|


|
Route 4 |
|

|
Route 5 |
|

|
Route 6 |
|

|
Route 6 |
|

|
Route 7 |
|

|
Route 8 |
|

|
Route 9 |
|

|
Route 9 |
|

|
Route 10 |
|

|
Route 11 |
|

|
Route 11 |
|

|
Route 12 |
|

|
Route 13 |
|

|
Route 14 |
|

|
Route 15 |
|

|
Route 16 |
|

|
Route 18 |
|
1.4. Received and Interactable Pokémon.
| Pokémon | Level | Moves | Location | Notes |
|---|---|---|---|---|
| Received Pokémon | ||||
 |
5 | Tackle (35) Leer (30) |
Nuvema Town | Starter |
 |
Tackle (35) Leer (30) |
|||
 |
Tackle (35) Leer (30) |
|||
|
10 | Scratch (35) Leer (30) Lick (30) Vine Whip (15) |
Dreamyard | If you chose Tepig |
|
Scratch (35) Leer (30) Lick (30) Incinerate (15) |
If you chose Oshawott | ||
|
Scratch (35) Leer (30) Lick (30) Water Gun (25) |
If you chose Snivy | ||
 |
25 | Aqua Jet (20) AncientPower (5) Crunch (15) Wide Guard (10) |
Relic Castle | Revived in Nacrene City’s museum. Can only choose one |
 |
Pluck (20) AncientPower (5) Agility (30) Quick Guard (15) |
|||
 |
Egg | Ember (25) String Shot (40) |
Route 18 | Given as an egg |
 |
5 | Splash (40) | Marvelous Bridge | Purchased for 500 PokéDollars |
 |
Water Gun (25) Rollout (20) Leer (30) Mud Shot (15) |
Twist Mountain | A man gives you a random Fossil per day after obtaining the National Pokédex |
|
 |
Absorb (25) Leer (30) Mud Shot (15) Sand-Attack (15) |
|||
 |
Scary Face (10) Roar (20) Agility (30) AcientPower (5) |
|||
 |
Constrict (35) Acid (30) Ingrain (20) Confuse Ray (10) |
|||
 |
Mud Sport (15) Water Gun (25) Metal Claw (35) Protect (10) |
|||
 |
Pursuit (20) Take Down (20) Scary Face (10) Assurance (10) |
|||
 |
Metal Sound (40) Take Down (20) Iron Defense (15) Swagger (15) |
|||
| Interactable Pokémon | ||||
 |
35 | Thrash (10) Belly Drum (10) Flare Blitz (15) Hammer Arm (10) |
Desert Resort | Needs to be awakened with a Rage Candy Bar. It has its Hidden Ability, Zen Mode. Only 5 of them can be found |
 |
20 | Bide (10) Mega Drain (15) Ingrain (20) Faint Attack (20) |
Route 6 | Found as a fake item. Only 2 in this location |
|
30 | Ingrain (20) Faint Attack (20) Sweet Scent (20) Giga Drain (10) |
Route 10 | Found as a fake item. Only 2 in this location |
 |
40 | Sweet Scent (20) Giga Drain (10) Toxic (10) Synthesis (5) |
Route 10 | Found as a fake item. Only 2 in this location |
|
50 | Defense Curl (40) Lucky Chant (30) Psybeam (20) Hypnosis (20) |
Dreamyard basement | After beating the Pokémon League. Only on Friday |
 |
70 | Silver Wind (5) Quiver Dance (20) Heat Wave (10) Bug Buzz (10) |
Relic Castle | In a new area of the Relic Castle, after obtaining the National Pokédex. Beware of its power |
1.4. Legendaries.
| Pokémon | Level | Moves | Location | Notes |
|---|---|---|---|---|
 |
42 | Helping Hand (20) Retaliate (5) Iron Head (15) Sacred Sword (20) |
Guidance Chamber in Mistralton Cave | |
 |
42 | Helping Hand (20) Retaliate (5) Rock Slide (10) Sacred Sword (20) |
Trial Chamber in Victory Road | Cobalion must be caught first to find it |
 |
42 | Helping Hand (20) Retaliate (5) Giga Drain (10) Sacred Sword (20) |
Rumination Field in Pinwheel Forest | |
 |
75 | Glaciate (10) Dragon Pulse (10) Imprison (10) Endeavor (5) |
Giant Chasm | Reach the middle of the Giant Chasm to activate a snowfall and unlock Kyurem's cave |
 |
40 | Revenge (10) Air Cutter (25) Extrasensory (30) Agility (30) |
Roaming Unova | After obtaining all badges. Black exclusive. |
 |
40 | Revenge (10) Shock Wave (20) Heal Block (15) Agility (30) |
After obtaining all badges. White exclusive. |
|
 |
70 | Rock Slide (10) Earthquake (10) Sandstorm (10) Fissure (5) |
Abundant Shrine on Route 14 | Having Tornadus and Thundurus in your team |
1.5. Roamers.
Tornadus and Thundurus will be roaming the region, as mentioned previously. To activate them, you will need to have beaten all gyms, then head to the entrance gate to Route 10, where a woman will talk about weird weather conditions on Route 7. When you get there, you will enter a house, and an old woman will tell you about Tornadus’ or Thundurus’ story, depending on your version. After exiting the house, they will be waiting outside but will quickly leave. Now they are actively roaming Unova and will have to be chased down wherever there are extreme weather conditions.
There is one thing that makes this hunt different from others, and it’s because of Generation 5’s Pokédex new mechanic where the Shiny form is shown. If you trade a Tornadus or Thundurus to your game before hunting them to have them registered, you will be able to check if they are Shiny or not in their Pokédex entry. This trick saves a lot of time during the hunt, making them the fastest roamers.
The process to hunt them would go as follows:
-
Progress through the sequence as normal up to the point where the old woman tells the story.
-
Save in front of the exit of her house (without going outside).
-
Go outside and see the scene where the roamer flies away.
-
Check the Pokédex entry and their forms. If the Shiny form isn’t there, reset.
You will only need to repeat steps 3 and 4 for each reset. This is the best roamer hunt for beginners! Make sure to bring something with Mean Look or Shadow Tag so they don’t run away when you decide to catch the Shiny. Moves like False Swipe and Spore will also make your life easier.
1.6. Huntable Events.
Mystery Gifts.
Although the Pokémon that have always been given through Mystery Gifts were locked to be normal, with the exception of a few that were given in their Shiny form on purpose, there are some that are able to be hunted (with the regular 1 in 8192 odds) in Generation 5.
| Pokémon | Event | Date | Card |
|---|---|---|---|
 |
Pokémon Searcher BW Piplup | April 28 to May 6, 2012 |
ポッチャマ プレゼント
ポケモンの イベントに 来てくれて
2012 4. 28. - 2012 5. 6.

|
 |
Strongest Class Pikachu | July 26 to 30, 2013 |
さいきょうクラスのピカチュウ
ポケモンセンターに 来てくれて
2013 7. 26 - 2013 7. 30.

|


|
Super Strong Pokémon Present Campaign | March 17 to April 15 (Groudon) April 16 to May 6 (Kyogre) 2012 |
ちょうきょうりょくポケモン プレゼント!
ポケモンセンターに 来てくれて
2012 3. 17 - 2012 4. 15.

ちょうきょうりょくポケモン プレゼント!
ポケモンセンターに 来てくれて
2012 4. 16 - 2012 5. 6.

|
  
|
Super Strong Pokémon Present Campaign | March 17 to April 1, 2012 |
ちょうきょうりょくポケモン プレゼント!
ポケモンセンターに 来てくれて
2012 3. 17 - 2012 4. 1.

ちょうきょうりょくポケモン プレゼント!
ポケモンセンターに 来てくれて
2012 3. 17 - 2012 4. 1.

ちょうきょうりょくポケモン プレゼント!
ポケモンセンターに 来てくれて
2012 3. 17 - 2012 4. 1.

|

|
Super Strong Pokémon Present Campaign | April 2 to 22, 2012 |
ちょうきょうりょくポケモン プレゼント!
ポケモンセンターに 来てくれて
2012 4. 2 - 2012 4. 22.

ちょうきょうりょくポケモン プレゼント!
ポケモンセンターに 来てくれて
2012 4. 2 - 2012 4. 22.

ちょうきょうりょくポケモン プレゼント!
ポケモンセンターに 来てくれて
2012 4. 2 - 2012 4. 22.

|
 
|
Super Strong Pokémon Present Campaign | April 23 to May 6, 2012 |
ちょうきょうりょくポケモン プレゼント!
ポケモンセンターに 来てくれて
2012 4. 23 - 2012 5. 6.

ちょうきょうりょくポケモン プレゼント!
ポケモンセンターに 来てくれて
2012 4. 23 - 2012 5. 6.

ちょうきょうりょくポケモン プレゼント!
ポケモンセンターに 来てくれて
2012 4. 23 - 2012 5. 6.

|
These events were only distributed in Japan during specific time frames and locations. The only way to obtain them is through the use of external software and/or modified hardware. To be able to add these events to your cartridge, you will need:
-
A 3DS with custom firmware. You can visit this guide to find out how to do it if you haven’t already.
-
Checkpoint 3DS to make backups of the save file. It can be found here, although the previous guide will make you install it anyway.
-
PKHeX on your computer.
-
The event files. They can be downloaded here.
If you aren’t playing on an official cartridge or have access to your save file, you will only need PKHeX. Follow these steps to obtain the events:
-
Backing up your save file with Checkpoint: Find the icon of your game in the app and go to “New…”. It will ask if you wish to backup the selected title and prompt you to write a file name. Remove the SD card and connect it to your computer.
-
There will be a folder named after your game located in 3ds/Checkpoint/saves. This folder will have the save file you just created. Make sure to make a backup of this file on your computer, just in case.
-
Import the save file in PKHeX. After the file is loaded, go to the “SAV” tab and click the “Mystery Gift” button. A new window will appear with your Mystery Gift card slots. Click “Import” and select the event file. The event information will appear at the top, so you will only need to right-click > “Set” in one of the slots to add the card. As a side note, you can add this event five times if you want to maximise the number of Pokémon you check per reset.
-
In PKHeX, go to “File” > “Export SAV…” > “Export Main”. Save the modified save file on the SD card (you can also overwrite the old copy if you have made a backup on your PC previously).
-
Insert the SD card back into the 3DS. Open Checkpoint and find the icon of your game once again. There, you will see a list of your save files. Select the one you modified in PKHeX and press restore. This process will take a few seconds. After it’s done, you can close Checkpoint.
To make sure that it worked, you can check the Mystery Gift menu in the title screen and “Check the card album”, where your new event will be waiting for you. After that, in any Pokémon Center you will find the delivery man (wearing a blue cap), who will give you the Pokémon. The hunting process goes as follows:
-
Obtain the Pokémon from the man.
-
Check if RNG has blessed you with a shiny.
-
Reset the game and go back to step 1.
Secret Egg and Kanto stickers.

Aside from Wi-Fi distribution, some events were also given through local downloads or by connecting with a staff member’s console. The staff was given a special cartridge specifically made for Pokémon distributions and were supposed to be sent back to Nintendo after the event dates, but, good news for us, some people kept said cartridges, which eventually led to their data being dumped online.
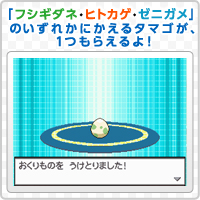
This time we can focus on the Secret Egg Distribution event cartridge. This event was held in the United States from April 27 to May 31 (2011) at some Toys “R” Us stores. These eggs are given randomly, and they hatch into three Pokémon based on the Black and White anime protagonists’ companions: Pidove (Ash), Pansage (Cilan), or Axew (Iris). The thing that makes these eggs special is that, just like Manaphy in Generation 4, they have a chance to be shiny when they are traded to other games. The difference this time is that the Pokémon will be able to be seen in their Shiny colours during the hatching sequence.
Purchasing one of these cartridges online can be very expensive, so there are workarounds with external software, just like in the previous section.
-
The event ROM can be found and downloaded here. This file can be saved to a flashcard with a second DS to act as the event distribution.
-
The DS that will distribute the event needs to have its date changed to any day between the two dates stated above (April 27 and May 31, 2011).
-
On the receiving DS, you can obtain the event by going to the Mystery Gift menu, then Receive Gift.
The process of hunting these eggs can be done similarly to the Manaphy egg from the previous generation.


Aside from the three previously mentioned event eggs, there are three others that were only distributed locally in Japan. In order to obtain the eggs, you needed to show the staff certain stickers you would receive when buying merchandise of the three Kanto starters and Pikachu. The distribution started on September 1, 2012, but the stickers could be obtained before that. These eggs work the same way and can be hunted following the same process, but this time the Pokémon are a bit more special: all three have at least one stat at 31 IVs and some special moves.
If you were looking for a more unconventional way to hunt the Kanto starters, this is the perfect option if you're up for the challenge! You can find the Wonder Card Mstery Gift files needed for each egg at the links in the table below.
 |
 |
 |
|
|---|---|---|---|
| Ability | Overgrow | Blaze | Torrent |
| IV at 31 | Defense | Speed | HP |
| Moves |
False Swipe Block Frenzy Plant Weather Ball |
False Swipe Block Blast Burn Acrobatics |
False Swipe Block Hydro Cannon Follow Me |
| Wonder Card | Bulbasaur | Charmander | Squirtle |
1.6. White Forest and Black City.
These two locations are the first of the series to be edition exclusive, with the White Forest being in White, and the Black City in Black. They can only be accessed after beating the game.
For Shiny hunting, the White Forest is the place we will focus on. Only the White Forest has wild encounters. But this does not mean that we will completely forget about the Black City, as it can still be useful, depending on the games that you have. Keep in mind that in order to have complete access to all the mechanics in these places, you will need at least two DS and two games (at least one of them being White).
So what is so special about these locations? Trainers will visit these areas and stay for a few days. Depending on the trainers, you will get different bonuses. In the Black City, they will add new items to the market. On the other hand, in the White Forest, new Pokémon will appear in the wild. This is the main reason why the forest is preferred, or you wouldn’t be able to Shiny hunt at all.
At the beginning of the game, when the save is created, 13 trainers will be chosen randomly from a list of 30. These trainers will be separated into two groups: 10 of them will go to the overwolrd (the White Forest or the Black City), and the other 3 will go to a place called “Entralink”.
The “active” trainers will appear in your White Forest or Black City, can be interacted with, and will make new Pokémon or items appear. These NPCs have a certain amount of happiness. This stat is invisible and will increase or decrease depending on your actions.
| Action | Happiness modifier |
|---|---|
| Entering the area | +3 |
| Battling the NPC (Black City) | +7 |
| Talking to the NPC (White Forest) | +10 |
| A day passes | -5 |
What happens if an NPC loses enough happiness? They leave the area, but they don’t disappear completely; instead, they go to the Entralink. This is where the multiplayer aspect comes into play. But before diving into it, it’s important to mention that you can only have a maximum of 10 NPCs for each place, for a total of 20. If your Entralink is full, your trainers in the overworld will not lose any amount of happiness.
In order to get new NPCs, you will need to invite them from another player’s game’s Entralink. In this place, you will be able to see and talk to these trainers, who will ask you to visit your White Forest or Black City. This will move the NPC from that player’s Entralink to your White Forest or Black City. This will not mess with the original trainer’s game, as this is the intended purpose of the NPCs that end up in the Entralink.
Pokémon and NPC list.
| NPC | Spanish | Italian | French | German | Japanese | Korean | Grass | Water | Happiness | |
|---|---|---|---|---|---|---|---|---|---|---|
| W | B | |||||||||
 Ace Trainer Lena |
Malena | Betta | Rena | Jekaterina | レナ | 레나 |  |
 |
20 | 80 |
 Ace Trainer Vincent |
Vito | Eric | Calvin | Joe | ジュンイチ | 순호 |  |
 |
30 | 70 |
 Backpacker Carlos |
Giuseppe | Carlos | Carlos | Fernando | カルロス | 카를로스 |  |
|
70 | 30 |
 Backpacker Emi |
Elisa | Lara | Gabrielle | Nanette | エミ | 혜미 |  |
|
30 | 70 |
|
Backpacker Herman |
Don | Uto | Fabio | Shoya | ヒロアキ | 홍명 |  |
|
80 | 20 |
|
Backpacker Molly |
Sarah | Felicita | Aurélia | Anke | ヒロミ | 로미 |  |
 |
20 | 80 |
 Battle Girl Karenna |
Iraís | Kelly | Karin | Mira | カレン | 카렌 |  |
|
30 | 70 |
 Black Belt Ryder |
Pascual | Maurizio | Takuma | Yu | タクマ | 대웅 |  |
|
70 | 30 |
 Clerk Britney |
Cira | Tullia | Aurora | Andrea | サトコ | 서연 |  |
 |
30 | 70 |
 Clerk Collin |
Tristán | Mimmo | Sergei | Ottmar | ヒロノリ | 유식 |  |
|
30 | 70 |
|
Clerk Doug |
Jerry | Billy | Gildas | Alejandro | トモタカ | 효유 |  |
|
70 | 30 |
|
Clerk Piper |
Esther | Iumi | Enola | Cara | ユミコ | 유민 |  |
|
70 | 30 |
 Gentleman Frederic |
Cirilo | Zaro | Nico | Herbert | ツネカズ | 석원 |  |
|
30 | 20 |
 Hiker Gene |
Loeb | Costantino | Kévin | Elias | ガクト | 학도 |  |
|
30 | 70 |
 Lady Lynette |
Romina | Eduarda | Aristée | Iphigenie | シオリ | 민서 |  |
|
70 | 30 |
 Lass Miki |
Carme | Antonietta | Valentine | Frieda | ミキ | 미키 |  |
|
30 | 70 |
 Nursery Aide Miho |
Lola | Eva | Dorothée | Moya | ミホ | 미호 |  |
|
70 | 30 |
 Pokémon Ranger Eliza |
Dorita | Claudia | Solange | Gordana | エリザ | 엘리자 |  |
|
70 | 30 |
 Pokémon Ranger Ralph |
Melas | Peppe | Quentin | Arnold | ソウスケ | 조현 | |
|
30 | 70 |
 Rich Boy Pierce |
Alonso | Ulrico | Daniel | Thomas | ヒトシ | 다인 |  |
|
30 | 70 |
 Roughneck Dave |
Honorio | Muzio | Loïc | Selim | タクロウ | 세형 |  |
|
70 | 30 |
 Schoolkid Leo |
Pietro | Pierino | Nestor | Manfred | シュウサク | 채수 |  |
|
70 | 30 |
|
Schoolkid Shane |
Olao | Ugo | James | Goro | トシノブ | 준재 |  |
|
30 | 70 |
 Schoolkid Silvia |
Azucena | Elsa | Cerise | Sybille | ヒロコ | 고현 |  |
|
30 | 70 |
 Scientist Jacques |
Rober | Galileo | Luc | Dwain | サトル | 지관 |  |
|
30 | 70 |
 Scientist Marie |
Sole | Gigliola | Noémie | Swetlana | カズホ | 이삭 |  |
|
70 | 30 |
 Socialite Grace |
Pitu | Morgana | Grace | Hildegard | グレース | 그레이스 |  |
|
20 | 30 |
 Veteran Ken |
Ken | Nico | Gurvan | Gerd | ケン | 캔 |  |
|
70 | 30 |
 Veteran Rosa |
Lila | Rosy | Rosa | Kajsa | ローザ | 로자 |  |
|
80 | 20 |
 Youngster Robbie |
Max | Piero | Kamel | Berno | マサオ | 제민 |  |
|
80 | 20 |
Make NPCs leave.
Sometimes your White Forest will end up having NPCs you may not be too fond of anymore and will want to make them go away while keeping others. In order to do so, you must follow these steps:
-
(Skip this step if you want to remove all NPCs) – Talk to the trainer(s) that you want to maintain in the forest, so their happiness goes up 10 points.
-
Exit the White Forest, stay outside the gate to the forest on Route 14 or 15, and save.
-
Close the game and open the DS settings. Set the time to 23:59 and open the game again.
-
Wait for the clock to go from 23:59 to a few minutes into the new day. You can check this in the C-Gear.
-
Enter the gate, then exit back onto one of the routes. This will decrease the happiness of all NPCs by 5.
Repeat the process until the undesired NPCs leave the area. If there are any of them you may want to keep, it’s very important that you talk to them every time so their happiness doesn’t go down, as there is no way of knowing the current happiness of each of them.
Get new NPCs.
If your White Forest has no trainers or the ones that you want, you will need to search for them. In order to reset the NPCs as quickly as possible and get new ones, you will need:
-
One DS with the White cartridge you want to get the NPCs in for hunting purposes. It obviously needs to have a save file where you have access to the White Forest.
-
A second DS with a Black cartridge. You will have to reset the save file in order to find new NPCs, so it’s better to use one with no important save data.
If your save file is old, there’s a chance that your Entralink may already be full, and you will have a chance to find your desired NPC among the ones located there.
-
Set the characters in both games in Nimbasa City with the C-Gear turned on. Here, in White, go to “Wireless” in the C-Gear menu, then “Entralink”.
-
Inside the Entralink, head west and stand on the bridge until a dialogue box says you are connected to the Black game’s world.
-
You cross the bridge and go to the other game’s Entree. Here, you will be able to teleport to the Black City. If you have never accessed the Entralink before, you will need to accept a mission first, and then you will be able to warp.
-
Walk around the Black City to see if your desired NPC is there. Their name will appear when you speak to them. Invite them to your White Forest if they’re there.
If you haven’t found the NPC you want, you will have to reset the save file on Pokémon Black (the White game stays as is) and play up to Nimbasa City, where you will be granted access to the Entralink functions for the first time. This will generate new trainers in Black to check. Repeat the previous steps. White and Black are used to keep it simple, but two White cartridges can work for the same purpose (you don't need one of each version).
 2. Black 2 and White 2.
Returning mechanics and other important information.
Dark grass makes an appearance once again in the region.
Phenomenon work the same way as the previous games, with a new mechanic.
2.1. Double encounters.
Aside from the usual chance for two encounters at the same time in Dark Grass, there are some portions of the game where you will travel with a partner trainer, the same thing that happened multiple times in Sinnoh. In this case, there are a total of two trainers that will join you. Keep in mind that they can accidentally kill the Shiny Pokémon, just like in Generation 4.
What’s the best part about these? The double encounters also work for Phenomenon. This makes the hunts much easier in these locations for rare Pokémon like Excadrill, Scolipede, Slaking, etc.
| Location | NPC | Pokémon owned | Notes |
|---|---|---|---|
| Reversal Mountain |  |

 
|
Mandatory in order to continue the story |
| Pinwheel Forest |  |
 
|
Post-game. Mandatory if you want to cross the Pinwheel Forest. |
2.2. Phenomenon and Pass Powers.
Entralink changes.
If you have read the section about the White Fores from Black and White, you should already be familiar with the existence of the Entralink. This location has been updated and no longer lets players visit other games' worlds, and the Entralink Missions have been replaced with Funfest Missions. Pass Powers can be obtained with Pass Orbs, which are rewarded after finishing these Funfest Missions. These mechanics are worth mentioning now, as they may help you during your hunts.
Pass Powers and Funfest Missions.
Pass Powers make a comeback in these games, but with an expanded amount of types, which are the ones that make this whole process worth it, unlike the original Black and White. First, let’s talk about what a Pass Power is, as it hasn’t been mentioned before: they are special bonuses that can be activated and shared in the C-Gear within a limited timeframe (unless they are instant effects like HP recovery). These bonuses can be, for example, increased EXP during battles, more money after battles, a higher chance for wild encounters, etc. The effects have three levels, which may vary from increasing (represented by the symbols ↑, ↑↑, and ↑↑↑) or decreasing (similarly to the previous one; ↓, ↓↓, and ↓↓↓). There are extra S and Max categories that function just as the ↑↑↑ ones, but with a longer timer (10 minutes instead of 3).
In order to unlock these effects, you will need to level up your Entree. The Entree is divided into two categories: Black and White. They are independent of each other, and some Pass Powers may ask for one or both of them to be developed to a certain point. The way you can increase this level will be explained later on. After reaching the required levels, you can purchase Pass Powers with Pass Orbs, items exclusive to the Entralink that work as currency. They can be obtained through the Funfest Missions, the main thing you will be doing in order to progress with this content, but first, let’s introduce the new Pass Powers added in Black 2 and White 2 and why they may convince you that this is all worth the effort:
| Pass Power | Effect | Entree level | Pass Orbs |
|---|---|---|---|
| Exploring Power ↑ | Increases the chance of finding rustling grass and dust clouds a little. |
After tutorial mission | 5 |
| Exploring Power ↑↑ | Increases the chance of finding rustling grass and dust clouds. |
 Level 5 Level 5
|
10 |
| Exploring Power ↑↑↑ | Increases the chance of finding rustling grass and dust clouds a lot. |
 Level 15Level 15 Level 15Level 15
|
15 |
| Exploring Power S | Increases the chance of finding rustling grass and dust clouds a lot (10 minutes). |
Level 100
|
50 |
| Grotto Power ↑ | Increases the chance of encountering Pokémon in Hidden Grottoes a little. |
Level 10Level 10
|
5 |
| Grotto Power ↑↑ | Increases the chance of encountering Pokémon in Hidden Grottoes. |
Level 20Level 20
|
10 |
| Grotto Power ↑↑↑ | Increases the chance of encountering Pokémon in Hidden Grottoes a lot. |
Level 30Level 30
|
15 |
| Grotto Power S | Increases the chance of encountering Pokémon in Hidden Grottoes a lot (10 minutes). |
Level 50Level 50
|
50 |
| Lucky Power ↑ | Increases the chance of encountering uncommon Pokémon slightly. |
Level 7Level 7
|
10 |
| Lucky Power ↑↑ | Increases the chance of encountering uncommon Pokémon a little. |
Level 21Level 21
|
20 |
| Lucky Power ↑↑↑ |
Increases the chance of encountering uncommon Pokémon. Shiny chance increased to 1/4096 (1/2048 with Shiny Charm) |
Level 49Level 49
|
30 |
| Lucky Power S |
Increases the chance of encountering uncommon Pokémon (10 minutes). Shiny chance increased to 1/4096 (1/2048 with Shiny Charm) |
Level 100
|
50 |
As you can see, using these bonuses can highly improve some of your hunts, and they also make Phenomenon hunts not that big of a hassle. Breeding Shiny Pokémon with hidden abilities is also more accessible, giving you a higher chance of finding the parent in Hidden Grottoes. Whether you want to go to the highest level or not is up to you, depending on whether those 10 minutes are worth it. For Lucky Power, it is recommended to not surpass level ↑↑ for people who want to keep the odds as pure as possible.
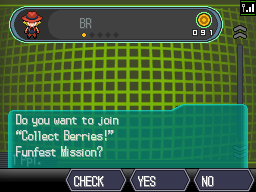
Now comes the big question: how do these Funfest Missions work, and how do you obtain Pass Orbs? It’s very simple: first, you will need to teleport to your Entralink through the C-Gear (Wireless → Entralink). If it’s the first time you’re here, an old man will tell you about the place you are in and will prompt you to do your first mission by interacting with the Entree. You will have to find some berries around the region. After you’re done, you can teleport back to the Entralink, and the man will talk about Pass Powers and how to select them (you can have up to three at the same time in your C-Gear). From this point on, you will have the low-level missions available, as well as the default Pass Powers.
Funfest Missions give your Entree experience points that will be used to level up. The colour that receives these points is determined by the Funfest Mission’s host game version. If you’re playing alone, it will always increase the level of your version (black level for Black 2, and white level for White 2).
As for Pass Orbs, each mission will have a base amount as a reward, depending on the level of the mission, after beating the target score. Obtaining more score than required will increase the quantity of orbs. The formula used to calculate the final amount is as follows:
(Total score × Mission level) / 3
The result is rounded down and capped at 99. There’s some type of mission that ends as soon as the target is met. The formula for them is:
Personal score + ((Seconds remaining × Mission level) / 45)
But for this guide, the only mission you will have to do uses the first formula, and we will only focus on that one. If you are interested in doing other quests, you can check out the full list here. One of the best quests to do is “Find lost items!” and it will net you a decent amount of Pass Orbs. To unlock the mission, you must beat “Collect Berries!” once first. As for the experience points, both Black and White use the same levelling system:
| Level | 1 | 2 | 3 | 4 | 5 | 6 | 7 | 8 | 9 | 10+ |
|---|---|---|---|---|---|---|---|---|---|---|
| EXP req. | 5 | 10 | 10 | 10 | 10 | 10 | 10 | 10 | 10 | 50 |
Having both versions and 2 DS will be enough for farming levels and unlocking everything. During the “Find lost items!” mission, all items will appear in the same spot for all players, so it won’t be too difficult to go through them in both games as a solo player. In order to have other games join the host, you will need to follow these steps:
-
Go to the Entralink in the host game and select a Funfest Mission. Leave it there.
-
In the other game, turn on the C-Gear and touch the square in the middle. This will open the nearby list of players, where the host game should appear.
White 2 seeing the Black 2 player. 
Black 2 seeing the White 2 player. -
Start the Funfest Mission in the host game. The guest game should see a message appearing about the mission starting, asking if you want to join.
Joining a Funfest Mission. -
Both games should be on the same mission now.
It is highly recommended to use Exploring or Lucky powers while doing a Phenomenon hunt, not just for convenience but to have a higher chance to find the target and not phasing as much.
Rustling grass.
| Pokémon | Location | Game |
|---|---|---|
|
Almost all places with grass. |
|
 |
Routes 6, 11, and 12, Village Bridge, and Abundant Shrine |
|
 |
Route 6 |
|
|
Routes 5, 9, and 16 |
|
|
Giant Chasm (forest) |
|
|
Dreamyard |
|
 |
Castelia Park |
|
 |
Routes 1, 2, 6, 12, 18, and 20, Dreamyard, Village Bridge, Victory Road, and Floccesy Ranch |
|
|
Routes 5, 6, 7, 9, 10, 11, 12, 13, 14, 15, and 16, Dragonspiral Tower, and Abundant Shrine |
|
|
Routes 11, 15, and 23, and Victory Road |
|
|
Route 9 |
|
 |
P2 Laboratory |
|
|
Routes 6 and 12, and Pinwheel Forest |
|
 |
Route 2 |
|
|
Abundant Shrine, Castelia City, Lostlorn Forest, Pinwheel Forest (inside), and Victory Road |
|
 |
Castelia Park |
|
 |
P2 Laboratory |
|
|
Giant Chasm (forest) |
|
|
Giant Chasm (forest) |
|
|
Dreamyard |
|
|
Abundant Shrine |
|
|
|
Lostlorn Forest and Pinhweel Forest (inside) |
|
 |
Route 19 |
|
|
Route 9 |
|
 |
Route 12, Lostlorn Forest, and Victory Road |
|
|
Routes 15, 18, and 23, Pinwheel Forest (outside), and Victory Road |
|
 |
Pinwheel Forest (inside) |
|
|
Pinwheel Forest (outside) |
|
 |
Nature Preserve |
|
 |
Pinwheel Forest (inside) |
|
|
Routes 1, 2, and 3, and P2 Laboratory |
|
|
Routes 13 and Giant Chasm |
|
|
Routes 15, 18, and 23, Pinwheel Forest (outside), and Victory Road |
|
|
Route 15 |
|
|
|
Routes 3, 6, 7, and 12, and Dragonspiral Tower |
|
 |
Dragonspiral Tower and Giant Chasm |
|
|
Lostlorn Forest and Route 12 |
|
|
Castelia Park, Pinwheel Forest (inside), Abundant Shrine, Lostlorn Forest, and Victory Road |
|
|
Routes 1 and 2, and Dreamyard |
|
 |
Route 3, Pinwheel Forest (outside) |
|
Rippling water.
| Surfing | ||
|---|---|---|
| Pokémon | Location | Game |
|
Routes 4, 17, and 18, P2 Laboratory, Birbank City, and Birbank Complex |
|
|
|
Almost all places with water tiles. |
|
|
|
Routes 11, 14, and 23, Lostlorn Forest, Victory Road, and Nature Preserve |
|
|
Route 3 |
|
|
Humilau City |
|
 |
Route 3 and Striaton City |
|


|
Castelia Sewers |
|
|
|
Routes 4, 13, 17, 18, and 21, Seaside Cave, P2 Laboratory, Undella Bay, and Humilau City |
|
|
Village Bridge |
|
|
Route 21 and Undella Bay (Spring, Summer, and Autumn) |
|

|
Routes 6, 20, and 22, Floccesy Ranch, Village Bridge, Abundant Shrine, Pinwheel Forest, Relic Passage, and Victory Road |
|
 |
Route 8 |
|
|
|
Undella Bay (Winter) |
|
|
|
Seaside Cave and Giant Chasm |
|
|
Route 8, Icirrus City, and Moor of Icirrus |
|
|
Route 13, Undella Town, and Humilau City |
|
|
Route 13 and Undella Town |
|
|
Route 8, Icirrus City, and Moor of Icirrus |
|
|
|
Undella Bay |
|
| Fishing | ||
|---|---|---|
| Pokémon | Location | Game |
|
|
Route 8, Icirrus City, and Moor of Icirrus |
|
|
|
Almost all places with water tiles |
|
|
|
Village Bridge |
|
|
|
Undella Bay |
|
|
|
Dragonspiral Tower |
|
|
|
Route 1 |
|
|
|
Routes 3, 11, and 14, Aspertia City, Striaton City, Pinwheel Forest, and Abundant Shrine |
|
 |
Route 4 |
|
|
|
Castelia Sewers |
|

|
Routes 17 and 18, P2 Laboratory |
|
 |
Route 4 |
|

|
Birbank City and Birbank Complex |
|
|
Routes 4, 17, and 18, P2 Laboratory, Birbank City, and Birbank Complex |
|
|
Routes 13 and 21, Humilau City, Undella Town, and Seaside Cave |
|
|
Nature Preserve |
|
|
Route 21 and Undella Town |
|
|
Routes 6, 19, and 20, Floccesy Ranch, Lostlorn Forest, and Victory Road |
|
|
Routes 6, 19, 20, and 23, Wellspring Cave, Giant Chasm, Lostlorn Forest, Floccesy Ranch, Relic Passage, Clay Tunnel, and Victory Road |
|
|
Route 23, Wellspring Cave, Giant Chasm, Relic Passage, Clay Tunnel, and Victory Road |
|
|
Route 4, P2 Laboratory, Birbank City, and Birbank Complex |
|
|
Route 4 |
|
 |
Route 21 and Undella Town |
|
|
|
Route 13, Undella Town, Humilau City, and Seaside Cave |
|
|
Route 8, Icirrus City, and Moor of Icirrus |
|
Dust cloud.
| Pokémon | Location | Game |
|---|---|---|
|
Relic Passage, Mistralton Cave, Chargestone Cave, and Guidance Chamber |
|
|
Victory Road, Giant Chasm, Clay Tunnel, Twist Mountain, Reversal Mountain, Wellspring Cave, Seaside Cave, and Underground Ruins |
|
 |
Relic Passage, Victory Road, Twist Mountain, Clay Tunnel, and Underground Ruins |
|
 |
Twist Mountain, Clay Tunnel, and Underground Ruins |
|
Bridge shadow.
| Feather | Stat | Pokémon | Location |
|---|---|---|---|
Health Wing |
HP | |
Driftveil Drawbridge |
Muscle Wing |
Attack | ||
Resist Wing |
Defense | ||
Genius Wing |
Special Attack | |
Marvelous Bridge |
Clever Wing |
Special Defense | ||
Swift Wing |
Speed | ||
Pretty Wing |
- |
2.3. Nature Preserve.
The Nature Preserve is a hidden location in Unova, not usually accessed by many players. In fact, it is so secret that it doesn’t even appear on the map; it appears to be far away from the Unova region. The fact that you can’t reach it through normal means, crossing routes like any other relevant area, is what makes it interesting. To be able to find it, you will need to follow these steps:
-
See all 297 Pokémon from the Unova Pokédex (except Victini, Keldeo, Meloetta, and Genesect).
-
Go to Nuvema Town and talk to Professor Juniper in her laboratory. She will give you the “Permit”, the item needed to go to the Nature Preserve.
-
Show the Permit to the staff of Mistralton City’s airport. Skyla will take you to the Nature Preserve on a plane.
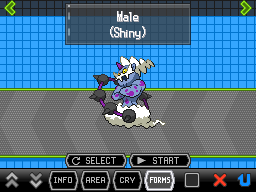
There are a few Pokémon in this area that do not appear in the rest of the game, both in the water and grass. But there is an extra reward for the task previously completed: there is a special Shiny Haxorus overworld encounter, just like the red Gyarados from back in Johto, but with a lot more work put into it to obtain. Be careful with its Guillotine while catching it; make sure to bring a ghost-type Pokémon higher than level 60 or with the Sturdy ability.
Shiny Haxorus

Data:
Ability: Rivalry / Mold Breaker
Item: None
Level: 60
Moves:
Taunt
Dragon Pulse
Swords Dance
Guillotine
As for wild Pokémon, there is both normal and dark grass. These are all the Pokémon found in this area:
| Grass | Rustling grass |
|---|---|


|
|
| Water | Rippling water |
|
|
|
| Fishing | Fishing on Rippling water |
|
|
|
Magikarp and Gyarados.
In the water, there are two very rare encounters: a 1% Magikarp (fishing normally) and a 1% Gyarados (fishing in Rippling water). But the special thing about them is the fact that they can appear from level 1 to level 100. That means that there’s a 1% chance to find one of them that then has another 1% chance of being level 100 (or any other number you may like). It’s a game of stacking small probabilities on top of each other. If you hate yourself enough and are up to the task of finding the rare level 100 Shiny Gyarados, be my guest.
2.4. Key system.
A new system was introduced in these games, with the objective of trading keys that unlock extra features. This new content includes different difficulties, the ability to swap between the White Forest and Black City, but most importantly, finding all of the Regis. Some of these keys are naturally obtained after beating the game, but a few of them require trading.
You will have Regirock’s key since the beginning of the game, but it won’t be useful until after beating the game, when you get access to the Clay Tunnel, where Regirock can be found. The Underground Ruins will be at the end of this cave; you will find a big door standing closed in front of you. In order to open it, one of the keys must be active, and while standing in the middle of the circle drawn on the floor, you will take 6 steps down and 9 steps right, then press A. This will activate a button that opens the way into the corresponding chamber. The Rock Peak Chamber can be accessed while the Rock Peak Key is active; the Iceberg Chamber needs the Iceberg Key (obtainable in White 2 after caching Regirock; only by trade in Black 2); and the Iron Chamber will open with the Iron Key (obtainable in Black 2 after caching Regirock; only by trade in White 2).
After catching all three and putting them in your party, the last room that will open will be located inside Twist Mountain. Here, find the room with a frozen stone. It will have a new entrance, which will take you to Regigigas’ chamber.
| Both versions | Black 2 - Iron Key | Having all three |
|---|---|---|
 |
 |
 |
| White 2 - Iceberg Key | ||
 |
2.5. Received and Interactable Pokémon.
| Pokémon | Level | Moves | Location | Moves |
|---|---|---|---|---|
 |
5 | Tackle (35) Leer (30) |
Aspertia City | Starter |
 |
Tackle (35) Leer (30) |
|||
 |
Tackle (35) Leer (30) |
|||
|
Egg | Pound (35) Charm (20) |
Gate between Nacrene City and Route 3 | Given by a Pokémon Breeder |
|
5 | Splash (40) | Marvelous Bridge | Purchased for 500 PokéDollars |
|
Water Gun (25) Rollout (20) Leer (30) Mud Shot (15) |
Twist Mountain | A man gives you a random Fossil per day after obtaining the National Pokédex |
|
|
Absorb (25) Leer (30) Mud Shot (15) Sand-Attack (15) |
|||
|
Scary Face (10) Roar (20) Agility (30) AcientPower (5) |
|||
|
Constrict (35) Acid (30) Ingrain (20) Confuse Ray (10) |
|||
|
Mud Sport (15) Water Gun (25) Metal Claw (35) Protect (10) |
|||
|
Pursuit (20) Take Down (20) Scary Face (10) Assurance (10) |
|||
|
Metal Sound (40) Take Down (20) Iron Defense (15) Swagger (15) |
|||
|
25 | Aqua Jet (20) AncientPower (5) Crunch (15) Wide Guard (10) |
Nacrene City’s museum | Lenora gives you the choice between Cover and Plume fossils |
|
Pluck (20) AncientPower (5) Agility (30) Quick Guard (15) |
|||
| Interactable Pokémon | ||||
 |
25 | Pluck (20) Nasty Plot (20) Flatter (15) Faint Attack (20) |
Route 4 | Appears on Thursdays. Only in Black 2. Has its hidden ability |
 |
Wing Attack (35) Hone Claws (15) Scary Face (10) Aerial Ace (20) |
Appears on Mondays. Only in White 2. Has its hidden ability |
||
|
29 | Ingrain (20) Faint Attack (20) Sweet Scent (20) Giga Drain (10) |
Route 6 | Found as a fake item. Only 2 in this location |
|
36 | Sweet Scent (20) Giga Drain (10) Toxic (10) Synthesis (5) |
Route 7 | Found as a fake item. Only 3 in this location |
|
35 | String Shot (40) Leech Life (15) Gust (35) Fire Spin (15) |
Relic Castle | Reappears after beating the Pokémon League at level 65 if its defeated |
 |
42 | Stealth Rock (20) Rock Slide (10) Slash (20) X-Scissor (15) |
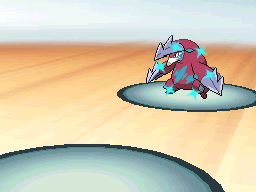
Seaside Cave | Mandatory to defeat or catch to continue the story |
|
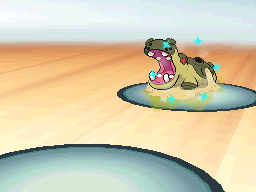
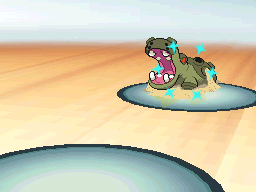
40 | Water Pulse (20) Ominous Wind (5) Brine (10) Rain Dance (5) |
Undella Bay | Appears on Thursdays. Only in White 2. Has its hidden ability |
|
Appears on Monday. Only in Black 2. Has its hidden ability |
|||
2.6. Fossils.
Even though Fossils can be obtained at Twisted Mountain, you can also receive them in two other ways:
-
Join Avenue Antique Shop: stores that sell unknown items that will be identified after being bought. Increasing the Join Avenue rank will make them have more items in stock. For example, if you buy a Dusty Stone (rank 10), you may receive a Thunder Stone. After reaching rank 15 and visiting the Join Avenue office after entering the Hall of Fame, there will be some rocks for sale that have a chance to contain one of the fossils. These shops have variations; the items sold will always be the same, but the ones they contain will differ. For the fossils, these are the possible variations:
Item Rank Price All variations A and B C and D Jagged Rock 3+ 300 


Rugged Rock 6+ 400 Rough Rock 8+ 500 Polished Rock 10 600 You will only be able to buy one of each item per day unless the shop's rank goes up, which will make it restock everything. As you can see, the NPC that gives a random fossil is more reliable than this method, but both being limited per day makes them go well hand in hand when it comes to maximising your chances of finding the fossil that you want. Which takes us to the next method.
-
Funfest Mission: after beating the Pokémon League, a new mission will be unlocked in the Entralink depending on your game’s version: “What is the best price?” for Black 2, and “What is the real price?” for White 2. In this quest, you will have to find men dressed in black throughout the region who will offer you different items at varying prices. If the deal is taken, the NPC will disappear and you will receive the item in your inventory, but if you decide not to buy it, the man will stay there and offer the same item for a different price. There are multiple useful items, like the DeepSeaTooth or the DeepSeaScale, but the reason we’re here is fossils, which are as follows:
Fossil Min price Max price Version 4000 24500 

This mission can be repeated as many times as you want, and the items will end up in your bag even if you don’t successfully complete it. There’s a total of 22 items these men in black can offer, 9 of them being fossils. It’s not a guaranteed chance, but you will see multiple NPCs during each mission. Each run takes 3 minutes. The only downside is that most fossils are version-exclusive, but you can still trade them to the opposite game if you need them. Alternatively, the missions “Forgotten Lost Items!” (Black 2) and “Not-Found Lost Items!” (White 2) have the chance to spawn Cover and Plume Fossils.
Here’s the name of the funfest missions in other languages:
Language Black 2 mission White 2 mission English What is the best price? What is the real price? Spanish Regateo sin concesiones ¡Bueno, bonito y barato! Italian Qual è il prezzo giusto? Qual è il prezzo vero? German Was ist es wirklich wert? Was ist der wahre Preis? French Vous en donnez combien? Et le vrai prix, alors? Japanese りそうの おねだんは…? ホントの おねだんは…?
2.7. Legendaries.
| Pokémon | Level | Moves | Location | Moves |
|---|---|---|---|---|
|
45 | Helping Hand (20) Retaliate (5) Iron Head (15) Sacred Sword (20) |
Route 13 | Reappears after beating the Pokémon League at level 65 if its defeated |
|
45 | Helping Hand (20) Retaliate (5) Rock Slide (10) Sacred Sword (20) |
Route 22 | |
|
45 | Helping Hand (20) Retaliate (5) Giga Drain (10) Sacred Sword (20) |
Route 11 | |
|
70 | Scary Face (10) Glaciate (10) Dragon Pulse (10) Imprison (10) |
Giant Chasm | After catching Zekrom or Reshiram on Dragonspiral Tower |
 |
68 | Psycho Shift (10) Charm (20) Psychic (10) Heal Pulse (10) |
Dreamyard | |
 |
Psycho Shift (10) Dragon Dance (20) Psychic (10) Heal Pulse (10) |
|||
|
65 | Iron Defense (15) Charge Beam (10) Lock-on (5) Zap Cannon (5) |
Underground Ruins in the Clay Tunnel | Requires Rock Peak Key active. More info in the Key system section |
|
Amnesia (20) Charge Beam (10 Lock-on (5) Zap Cannon (5) |
Requires Ice Key active. More info in the Key system section |
||
|
Amnesia (20) Charge Beam (10) Lock-on (5) Zap Cannon (5) |
Requires Iron Key active. More info in the Key system section |
||
|
68 | Revenge (10) Wide Guard (10) Zen Headbutt (15) Payback (10) |
Twist Mountain basement | While having Regirock, Regice, and Registeel in the team |
 |
65 | Future Sight (10) Amnesia (20) Extrasensory (30) Flail (15) |
In front of Nacrene Museum | Have to be found first inside the Cave of Being, on Route 20 |
 |
Future Sight (10) Charm (20) Extrasensory (30) Copycat (20) |
Celestial Tower summit | ||
 |
Future Sight (10) Nasty Plot (20) Extrasensory (30) Last Resort (5) |
Route 23 | ||
 |
68 | Scary Face (10) Lava Plume (15) Fire Spin (15) Iron Head (15) |
Reversal Mountain | Requires the Magma Stone, found on a cliff on the north of Route 18 |
 |
68 | Future Sight (10) Slash (20) Moonlight (5) Psycho Cut (20) |
Marvelous Bridge | Requires the Lunar Wing, found after completing a puzzle in the Strange House, near Lentimas Town |
2.8. Huntable Events.
Black 2 and White 2 have the opportunity to obtain the same events from the Huntable Events section of Black and White. All of the information needed is already available there.
2.9. Lass Diana.
Everyone knows about most in-game trades being shiny-locked, and this time is no different. But what if you could see the Pokémon that you gave away again? This is the case of Lass Diana, an NPC located in Accumula Town, inside the building to the southwest, after going downstairs. She will first ask you to trade her an Excadrill for her Ambipom. This Ambipom isn’t too out of the ordinary: it knows Agility, Double Hit, Fling, and Nasty Plot, holds a Sitrus Berry, and has a jolly nature. She will promise to train your Excadrill after the trade.
After you come back to the house and talk to her, she will say that Excadrill has trained enough now (it will be 5 levels higher than originally) and will ask you to battle her. This is where it gets interesting. If you happen to give her a Shiny Excadrill, it will be Shiny during the battle as well, showing you that it retains information from your original Pokémon. Sadly, this battle can only be won once, but that doesn’t mean it’s the end of it.
Diana will ask you to trade her a Hippowdon for her Alakazam as soon as you’re done battling. This will follow the same mechanic as before: Shiny Hippowdon will be kept.
 3. Other information.
3.1. DNS exploit.
This section only covers the configuration of the Generation 5 games to receive the Mystery Gifts. If you want to know more information, like how to set up a phone hotspot, check the DNS section of the Generation 4 guide.
The Generation 5 games are DSi-enhanced, letting them connect to more modern Wi-Fi access points. The only requirement is a 2.4 GHz connection, as it works with WPA2 security without needing an unsecured or WEP access point. If you are using a regular DS instead of a DSi or a 3DS, you will have to follow the same steps as the Generation 4 guide and setup a phone hotspot.
-
DSi: in “System Settings”, and then under the “Internet” section, select “Advanced Setup”.
-
3DS: in “System Settings”, and under the “Internet Settings” section, select “Connection Settings”.
To configure the connection:
-
In "SSID”, set the name of your router’s access point. In “Security”, set the type of security your Wi-Fi is using (if you don’t know, WPA2-PSK (AES) will work). Continue until you reach “DNS” and set “Auto-obtain DNS” to “No”. Set “Primary DNS” to 167.86.108.126.
-
Test the connection and save the settings. Use the Wimmfi error code lookup page if you have persistent issues.
You won’t need to unlock the Mystery Gift menu, as it will be available by default since the beginning of the game. The gifts you will receive are random. You can choose to accept or not. The server can still offer events that you have already received but won’t let you get them again.
| Black, White, Black 2, and White 2 | ||
|---|---|---|
| Pokémon | Event | Notes |
 |
2011 World Championships Scrafty | |
 |
Summer 2011 Pokémon | |
 |
||
 |
Secret Eggs | Can be Shiny if the eggs are sent to new save files. See more in the Huntable Events section |
 |
||
 |
||
 |
2012 World Championships Pikachu | Knows Fly |
|
Pika Pika Carnival Pikachu | |
|
Summer 2012 Pikachu | |
 |
Movie 14 Victini | |
 |
February 2012 Mewtwo | |
 |
May 2012 Darkrai | |
 |
Summer 2012 Keldeo | |
 |
Video Game Championships 2012 | |
 |
United States Summer 2013 Shiny Pokémon of Myth
International Summer 2013 Shiny Pokémon of Myth |
|
 |
||
 |
||
 |
2013 World Championships Smeargle | |
|
Pokémon Hills Mewtwo | |
|
Ray Rizzo's Metagross | |
 |
Toler Webb's Ludicolo | |
 |
Abram Burrow's Cloyseter | |
 |
Spring 2013 Meloetta | |
 |
Dutch Spring 2012 Pokémon | |
 |
||
 |
Summer 2011 Zoroark | |
 |
Plasma Deoxys | |
 |
Plasma Genesect | |
 |
Liberty Pass distribution | Key item. Grants access to Liberty Garden (Victini) |